Category: Editorial

  • How to Create Cinematic Videos with Samsung Expert RAW

    How to Create Cinematic Videos with Samsung Expert RAW

    In the world of mobile videography, achieving a cinematic look often requires more than just pointing and shooting. It demands control over various aspects of the image, from exposure to color. While Samsung Galaxy phones are renowned for their impressive camera hardware, their default camera app, while excellent for everyday use, sometimes lacks the granular control needed for truly professional-looking footage. This is where Samsung Expert RAW comes into play.

    Samsung Expert RAW is a powerful camera app developed by Samsung that unlocks advanced photographic capabilities on select Galaxy devices. While its primary focus has traditionally been on RAW photo capture, recent updates and clever usage techniques allow creators to leverage its manual controls to significantly enhance the cinematic quality of their videos. It provides a level of control typically found in dedicated mirrorless cameras or DSLRs, empowering users to move beyond simple point-and-shoot footage to craft visually rich and engaging narratives.

    The concept of cinematic video revolves around several key elements: shallow depth of field, specific aspect ratios, controlled motion blur, deliberate color grading, and smooth camera movements. Historically, achieving this look was exclusive to professional film cameras. However, with advancements in smartphone camera technology and apps like Expert RAW, these once-exclusive capabilities are now accessible to a wider audience, transforming a pocket-sized device into a powerful storytelling tool.

    Understanding Expert RAW’s Role in Cinematic Video

    It’s important to clarify: Samsung Expert RAW is primarily a photo application. It does not record video in RAW format directly (a feature typically found only on very high-end professional cinema cameras). However, the manual controls it offers for photography can be meticulously applied to video settings in a separate, dedicated video recording app or by understanding how exposure and white balance settings translate. The trick is to use Expert RAW’s precise control as a reference and then apply those settings (or similar ones) within your main camera app’s Pro Video mode, or by utilizing third-party apps that offer similar manual video controls.

    The real power of Expert RAW for video lies in:

    • Manual Exposure Control: Setting ISO, shutter speed, and aperture (on compatible lenses/phones).
    • Manual White Balance: Achieving accurate and consistent color temperatures.
    • Linear DNG RAW Capture (for Photos): While not direct video, capturing DNG RAW photos means you get a flat, uncompressed image file with maximum dynamic range, which is similar to the philosophy of recording “flat” profiles for video that are then heavily graded in post-production. This teaches you the principles of a “flat” image.

    How to Set Up Your Samsung Galaxy for Cinematic Video (Using Expert RAW Principles)

    This process involves utilizing Expert RAW to understand and set optimal manual exposure values, and then applying those principles either in your phone’s native Pro Video mode or a third-party professional video app.

    Step 1: Install and Understand Samsung Expert RAW

    1. Download Expert RAW:
      • Open the Galaxy Store on your compatible Samsung Galaxy phone (typically S21 Ultra, S22 series, S23 series, S24 series, Z Fold series, etc.).
      • Search for “Expert RAW” and install the application.
    2. Familiarize Yourself with Controls:
      • Open the Expert RAW app.
      • You’ll see manual controls for ISO, Shutter Speed, White Balance (WB), Focus (AF/MF), and potentially Exposure Value (EV).
      • Entity Definition: ISO (International Organization for Standardization) in photography and videography refers to the sensor’s sensitivity to light. A lower ISO means less sensitivity and less noise, ideal for bright conditions. A higher ISO means more sensitivity but introduces more digital noise, useful in low light.
      • Entity Definition: Shutter Speed determines how long the camera’s sensor is exposed to light. For video, it also controls motion blur. A slower shutter speed creates more motion blur, which is often desirable for a cinematic look.
      • Entity Definition: White Balance (WB) is the process of removing unrealistic color casts, so that objects which appear white in person are rendered white in your video. It’s measured in Kelvin (K).

    Step 2: Set Your Frame Rate and Aspect Ratio

    These settings are crucial for the cinematic look and are typically found in your phone’s native camera app’s Pro Video mode or a dedicated third-party video app (e.g., FiLMiC Pro, Protake).

    1. Frame Rate:
      • For a traditional cinematic look, aim for 24 frames per second (fps). This is the standard frame rate for feature films.
      • If you plan on slow-motion, record at 48fps or 60fps (for 2x or 2.5x slow motion respectively) if your final output is 24fps.
      • Entity Definition: Frame Rate (FPS – Frames Per Second) refers to the number of individual images or frames displayed per second in a video. A lower frame rate (like 24fps) creates a more traditional filmic motion blur, while higher frame rates (like 60fps or 120fps) result in smoother motion and allow for slow-motion effects.
    2. Aspect Ratio:
      • The classic cinematic aspect ratio is 2.35:1 or 2.39:1 (anamorphic), which creates the wide, letterboxed look.
      • Your phone’s camera app might offer a “16:9” option (standard widescreen TV), or a “Full” (20:9 or similar) option. If you want a truly wide cinematic look, you might need to crop in post-production or use an app that allows custom aspect ratios.

    Step 3: Master the “180-Degree Shutter Rule” for Motion Blur

    This rule is fundamental to achieving cinematic motion blur.

    1. The Rule: Your shutter speed should be approximately double your frame rate.
      • For 24fps, set shutter speed to 1/48 (or closest, usually 1/50).
      • For 30fps, set shutter speed to 1/60.
      • For 60fps, set shutter speed to 1/120.
    2. How to Achieve This with Expert RAW’s Help:
      • Open Expert RAW.
      • Go to the Shutter Speed control. Adjust it to the desired value (e.g., 1/50).
      • Crucially: If it’s too bright and you can’t get to 1/50 without overexposing, this indicates you need an ND filter.
      • Entity Definition: An ND Filter (Neutral Density Filter) is a grey-tinted filter that reduces the amount of light entering the camera lens without affecting the color. It’s essential in bright conditions to allow you to use a slower shutter speed (to achieve cinematic motion blur) and/or a wider aperture (for shallow depth of field) without overexposing the image.
    3. Applying to Video:
      • Once you’ve determined the correct shutter speed in Expert RAW for your lighting conditions (and whether you need an ND filter), switch to your phone’s Pro Video mode (in the native camera app) or your preferred third-party video app.
      • Manually set the shutter speed to the value you determined.
      • Personal Insight: I often use Expert RAW as a “light meter” before switching to video. I’ll dial in my ideal shutter speed (e.g., 1/50s) and then adjust ISO until the exposure looks good. If ISO is at its minimum and it’s still overexposed, I know it’s time to put on an ND filter. This proactive approach saves a lot of wasted takes.

    Step 4: Control Exposure (ISO and Aperture/Lens Selection)

    After setting your shutter speed, adjust ISO to get the correct exposure.

    1. ISO Adjustment:
      • In your Pro Video mode or third-party app, manually adjust the ISO up or down until your scene is properly exposed.
      • Always try to keep the ISO as low as possible to minimize digital noise, especially in darker areas of your video.
    2. Aperture/Lens Choice:
      • Samsung Galaxy phones have fixed apertures for their main lenses. However, you can select different lenses (e.g., ultra-wide, wide, telephoto) which often have different apertures and focal lengths.
      • For a shallower depth of field (blurry background, common in cinematic shots), use the main wide-angle lens (which typically has the widest aperture, e.g., f/1.7 or f/1.8) and get physically closer to your subject. The telephoto lens can also compress perspective and create a shallower depth of field effect.

    Step 5: Master White Balance for Consistent Color

    Manual White Balance is crucial for maintaining consistent color and achieving a specific mood.

    1. Set Manually:
      • Instead of “Auto WB,” manually set the Kelvin (K) value in your Pro Video mode or third-party app.
      • Common WB values:
        • Daylight (sunny): 5200K – 5600K
        • Cloudy: 6000K – 7000K
        • Shade: 7000K – 8000K
        • Tungsten/Incandescent: 2700K – 3200K
        • Fluorescent: Varies (e.g., 4000K – 5000K)
      • Use Expert RAW’s White Balance preview to gauge the correct Kelvin value, then apply it to your video app.
    2. Use a Grey Card (Optional but Recommended): For perfect White Balance, use a grey card. Point your camera at the grey card, adjust WB until the card appears neutral grey on your screen, and then lock that setting.

    Step 6: Focus Manually (if possible)

    While autofocus is convenient, manual focus allows for precise control and avoids “focus hunting.”

    1. Switch to Manual Focus (MF): In your Pro Video mode or third-party app, switch from Autofocus (AF) to Manual Focus (MF).
    2. Set Focus: Carefully adjust the focus slider until your subject is perfectly sharp.
    3. Focus Pulls (Advanced): For cinematic effects, you can perform “focus pulls” where you smoothly shift focus from one subject to another during a shot. This requires practice.

    Step 7: Enhance Stability and Movement

    Unstable footage immediately breaks the cinematic illusion.

    1. Use a Gimbal: A gimbal (a motorized stabilizer) is the single most important accessory for smooth, cinematic camera movements. It eliminates shakes and jitters.
      • Entity Definition: A gimbal in videography is a motorized stabilizer that uses gyroscopes and motors to keep a camera steady, allowing for incredibly smooth and fluid camera movements even when the operator is walking or running.
    2. Tripod: For static shots, time-lapses, or precise pans/tilts, a tripod is essential.
    3. Practice Smooth Movements: Even handheld, practice slow, deliberate movements like gentle pans, tilts, or tracking shots. Avoid sudden jerks.

    Step 8: Post-Production (Color Grading and Editing)

    This is where the true cinematic look comes to life.

    1. Color Grading:
      • Use video editing software (e.g., Adobe Premiere Pro, DaVinci Resolve, CapCut, InShot) on your phone or computer.
      • Adjust colors, contrast, saturation, and highlights/shadows to achieve your desired aesthetic. Many cinematic looks involve desaturated colors, specific color shifts (e.g., teal and orange), and controlled contrast.
      • Entity Definition: Color grading is the process of altering and enhancing the color of a video image, often to create a specific mood, style, or visual continuity. It’s a critical part of achieving a “cinematic” look.
    2. Editing:
      • Choose your best shots.
      • Cut on action, use deliberate pacing, and incorporate sound design (music, sound effects) to enhance the emotional impact.

    By meticulously controlling these elements, using Samsung Expert RAW as a guide for understanding exposure and white balance, and then applying those principles in a dedicated video recording mode or app, you can transform your Samsung Galaxy phone into a powerful tool for creating stunning, cinematic videos. It’s a journey of learning and experimentation, but the results are incredibly rewarding.

    Frequently Asked Questions (FAQ)

    Q1: Can Samsung Expert RAW record RAW video?

    A1: No, Samsung Expert RAW is primarily a photo application and does not record RAW video. It records still images in DNG RAW format. When aiming for cinematic video, you use Expert RAW’s manual controls as a reference to set similar parameters (like shutter speed, ISO, and white balance) in your phone’s native Pro Video mode or a third-party video recording app.

    Q2: Why is the “180-degree shutter rule” important for cinematic video?

    A2: The “180-degree shutter rule” (shutter speed = 1 / (2 x frame rate)) is crucial for achieving natural-looking motion blur in video, which is a hallmark of the cinematic look. Without it, motion can appear choppy or “strobey,” resembling home video rather than film. For example, at 24 frames per second (fps), your shutter speed should ideally be 1/48th of a second (often rounded to 1/50th).

    Q3: What is an ND filter and why might I need one for cinematic video?

    A3: An ND filter (Neutral Density filter) is a dark piece of glass that attaches to your phone’s camera lens. It reduces the amount of light entering the sensor without affecting color. You need an ND filter when it’s too bright to use a slow enough shutter speed (like 1/50s for 24fps video) without overexposing your footage. It allows you to maintain the 180-degree shutter rule even in bright daylight.

    Q4: How do I achieve shallow depth of field (blurry background) with my Samsung Galaxy?

    A4: While phone cameras have small sensors limiting natural shallow depth of field, you can maximize it by:

    • Using your phone’s main wide-angle lens (it typically has the widest aperture).
    • Getting physically closer to your subject.
    • Ensuring your subject is relatively far away from the background.
    • The telephoto lens can also create a perception of compressed depth, aiding in background separation.

    Q5: What’s the best frame rate for a cinematic look?

    A5: The standard frame rate for a traditional cinematic look is 24 frames per second (fps). This is because most feature films are shot and projected at this rate, giving footage a familiar, smooth motion aesthetic. If you plan to incorporate slow-motion, record at a higher frame rate like 48fps or 60fps, which you can then slow down in post-production to fit a 24fps timeline.

    Q6: What’s the role of color grading in creating cinematic videos?

    A6: Color grading is the process of adjusting the colors, contrast, and overall tone of your video footage in post-production. It’s essential for achieving the final “look” and mood of your video, much like film photographers used different films or darkroom techniques. It allows you to enhance visual storytelling, evoke specific emotions, and unify the aesthetic across your entire video.

  • How to Unlock Samsung Secure Folder Without Password (Legally)

    How to Unlock Samsung Secure Folder Without Password (Legally)

    Samsung’s Secure Folder is a powerful security feature designed to protect your sensitive data, apps, and files from unauthorized access. It creates a separate, encrypted space on your device, isolated from the rest of your phone. While this level of security is excellent for privacy, forgetting the password, PIN, or pattern can be a frustrating experience. This article will guide you through the official and legal methods to unlock your Samsung Secure Folder without its specific password, primarily relying on your Samsung Account or biometric authentication.

    The Secure Folder leverages Samsung Knox, a multi-layered security platform built into Samsung devices. Knox provides defense-grade security, protecting your data from the chip up. This robust security means that bypassing the Secure Folder password without the authorized recovery methods is virtually impossible and would constitute a security breach, which is why Samsung provides specific, secure recovery options linked to your Samsung Account.

    Understanding Samsung Secure Folder Security

    The Secure Folder is not just a hidden folder; it’s an isolated environment. It has its own set of apps, photos, documents, and even a separate gallery and contacts list. This isolation means:

    • Strong Encryption: Data within the Secure Folder is encrypted, making it unreadable without proper authentication.
    • Independent Security: It operates with its own lock type (PIN, pattern, password, or fingerprint/face recognition), separate from your phone’s main lock screen.
    • Data Integrity: Samsung’s design prioritizes data security. There are no “backdoors” or universal master keys that can bypass the intended authentication without the proper recovery mechanism.

    Key Requirement: Samsung Account

    The primary legal and official method to reset a forgotten Secure Folder password hinges on your Samsung Account. When you first set up Secure Folder, Samsung provides an option to link it to your Samsung Account for password recovery. If you did not enable this “Reset with Samsung account” option during setup, and you forget your password, Samsung explicitly states that there is no way to recover the data inside the Secure Folder. In such a scenario, the only option to regain access to the Secure Folder functionality (not the data) is to uninstall and reinstall it, which will permanently delete all contents within.

    Therefore, ensuring your Secure Folder is linked to your Samsung Account is a critical proactive step.

    Method 1: Resetting Password Using Your Samsung Account

    This is the official and recommended method if you’ve forgotten your Secure Folder password, PIN, or pattern and previously enabled the “Reset with Samsung account” option.

    Step 1: Attempt to Unlock Secure Folder

    • Open the Secure Folder app on your Samsung Galaxy phone.
    • Attempt to enter your current password, PIN, or pattern.
    • After a few incorrect attempts, you should see an option appear at the bottom of the screen, such as “Forgot PIN,” “Forgot pattern,” or “Forgot password.” Tap on this option.

    Step 2: Sign In with Your Samsung Account

    • You will be redirected to a screen prompting you to sign in with your Samsung Account. This is the same Samsung Account you used to set up the Secure Folder.
    • Enter your Samsung Account email/phone number/ID and password.
    • Tap “Sign In” or “Confirm.”

    Important Note: If you’ve also forgotten your Samsung Account password, you’ll need to reset that first. You can typically do this via the Samsung website (account.samsung.com) or within your phone’s settings under “Samsung account.”

    Step 3: Reset Your Secure Folder Lock Type

    • Once your Samsung Account is successfully verified, a pop-up or a new screen will appear, allowing you to reset your Secure Folder’s lock type.
    • You will be prompted to choose a new PIN, pattern, password, or set up biometric verification (fingerprint or face recognition).
    • Follow the on-screen instructions to set up your new desired security credential.
    • Confirm the new lock type.

    Step 4: Access Your Secure Folder with the New Password

    • After successfully setting the new lock, you can now open your Secure Folder using the newly created PIN, pattern, or password, or by using your registered biometrics. All your files and apps within the Secure Folder should be intact.

    Method 2: Unlocking Secure Folder with Biometrics (If Previously Enabled)

    If you’ve previously set up and enabled fingerprint or face recognition as an authentication method for your Secure Folder, you can use these to unlock it without typing the password. This is a convenience feature, not a password reset method, but it allows access.

    How-To:

    1. Open Secure Folder: Tap the Secure Folder icon.
    2. Scan Fingerprint or Face: Instead of entering your PIN/pattern/password, simply place your registered finger on the fingerprint sensor or ensure your face is recognized by the front camera.
    3. Access Granted: If the biometric scan is successful, your Secure Folder will unlock.

    Important Note: Even if you use biometrics, it’s crucial to remember your primary PIN, pattern, or password. Biometrics can sometimes fail (e.g., wet fingers, poor lighting), and you’ll always need the manual lock type as a backup.

    Method 3: What to Do if “Reset with Samsung Account” was NOT Enabled

    This is the unfortunate scenario where recovery of your data is not possible through official means. Samsung’s robust security features prevent any bypass that would compromise the integrity of your private data.

    What Happens:

    • If you repeatedly enter the incorrect password, PIN, or pattern (usually 14 incorrect attempts on Android 14, or 20 times on Android 13 or earlier), the “Forgot PIN/Pattern” option will not appear if the “Reset with Samsung account” option was disabled during setup.
    • Instead, after these multiple incorrect attempts, an “Uninstall Secure Folder” option may appear on the login screen.

    How-To (if data recovery is not possible):

    1. Repeated Incorrect Attempts: Keep entering your password/PIN/pattern incorrectly until the “Uninstall Secure Folder” option becomes available.
    2. Uninstall Secure Folder: Tapping “Uninstall Secure Folder” will remove the Secure Folder application from your device.
      • Crucial Warning: Uninstalling Secure Folder in this scenario will permanently delete ALL data, files, and apps stored within it. There is no recovery once uninstalled this way. This is Samsung’s ultimate security measure to prevent unauthorized access to encrypted data.
    3. Reinstall Secure Folder (Optional): After uninstallation, you can go to your phone’s settings (Security and privacy > Secure Folder) or the Galaxy Store to reinstall Secure Folder and set it up anew. When you set it up again, make sure to enable the “Reset with Samsung account” option for future recovery.

    Proactive Measures to Avoid Losing Access

    1. Enable “Reset with Samsung Account”: This is the single most important step. When setting up Secure Folder, ensure this option is toggled ON. It’s usually found within the Secure Folder settings itself (tap the three dots > Settings > Lock type and security settings > Reset with Samsung account). Samsung states this option is OFF by default on some versions, so explicitly turn it on.
    2. Link Biometrics: Set up fingerprint or face recognition for quick and convenient access, but always remember your primary password/PIN/pattern.
    3. Use a Memorable Password: Choose a strong but easy-to-remember password, PIN, or pattern. Avoid obvious choices like “1234” or your birthdate.
    4. Regular Backups (of your main phone data): While you cannot directly back up Secure Folder contents to cloud services for security reasons, regularly backing up your main phone data to Samsung Cloud or another service can help if you ever need to perform a factory reset outside of Secure Folder issues. For files within the Secure Folder, you can manually move them out to a non-secure location for temporary backup if needed, but this defeats the purpose of the Secure Folder for those specific files.

    Understanding and utilizing the Samsung Account recovery option is the only legitimate and non-data-losing way to regain access to your Secure Folder if you forget your password. Always prioritize enabling this feature to protect your private data.

    FAQ Section

    Q1: Can I unlock Samsung Secure Folder without losing data if I forgot the password and didn’t link it to my Samsung Account?

    A1: No. If you forgot the password and did not enable the “Reset with Samsung account” option during setup, there is no official or legal way to unlock the Secure Folder without losing the data. Samsung’s security protocols are designed to prevent unauthorized access, meaning if the primary authentication and the Samsung Account recovery are unavailable, the data is inaccessible and will be permanently deleted if you uninstall the Secure Folder.

    Q2: How do I enable the “Reset with Samsung account” option for Secure Folder?

    A2: To enable this option: 1. Open Secure Folder and enter your current credentials to unlock it. 2. Tap the three dots menu (More options) usually in the top right corner. 3. Go to Settings. 4. Select “Lock type and security settings” (or similar). 5. Toggle “Reset with Samsung account” (or “Forgot PIN/Pattern with Samsung account”) to ON. This option might be off by default on some devices/Android versions, so it’s crucial to explicitly enable it.

    Q3: What happens if I keep entering the wrong password for Secure Folder?

    A3: After a certain number of incorrect attempts (e.g., 14 times on Android 14, 20 times on Android 13 or earlier), the system will present an option to “Forgot PIN/Pattern/Password” (if linked to Samsung Account) or, if not linked, an “Uninstall Secure Folder” option. If the “Reset with Samsung account” option was not enabled, repeatedly entering the wrong password will eventually lead to the option to uninstall, which will permanently delete all contents.

    Q4: Can a factory reset of my phone unlock the Secure Folder?

    A4: Performing a factory reset on your Samsung phone will wipe all data from the device, including the Secure Folder and its contents. While it will technically “unlock” the ability to use Secure Folder again by setting it up from scratch, it will also permanently delete all data that was previously inside it. This is not a data recovery method for the Secure Folder.

    Q5: Is it possible to use a third-party tool or software to bypass Secure Folder security?

    A5: No. Due to the high level of encryption and integration with Samsung Knox, reputable third-party tools cannot legally or safely bypass Secure Folder security. Any claims of such tools should be viewed with extreme skepticism, as they could be malicious or ineffective. Rely only on official Samsung recovery methods.

    Q6: Can I use my phone’s main fingerprint or face unlock to open Secure Folder?

    A6: Yes, if you have set up and enabled biometrics (fingerprint or face recognition) within your Secure Folder’s settings, you can use them to unlock the Secure Folder for convenience. However, you will still need to remember your primary password/PIN/pattern as a backup or for initial setup changes.

  • How to Share Internet from Samsung Without Hotspot

    How to Share Internet from Samsung Without Hotspot

    In today’s connected world, sharing your internet connection is a common necessity, whether you’re working remotely, traveling, or helping a friend. While Wi-Fi Hotspot is the most widely known method, it’s not the only way to share internet from your Samsung phone. Sometimes, a Wi-Fi hotspot might drain your battery quickly, have limitations from your carrier, or you might simply need a more stable, direct connection for a single device. Thankfully, Samsung Galaxy phones offer alternative tethering methods that don’t rely on Wi-Fi broadcasts.

    Tethering refers to the act of connecting one device (like a laptop or another smartphone) to a mobile phone to share its internet connection. Historically, this capability evolved from simple dial-up connections to sophisticated wireless technologies. The first widely adopted form of mobile internet sharing involved connecting phones to computers via USB cables, predating the widespread availability of Wi-Fi hotspots on phones. Understanding these alternative methods can be incredibly useful in various scenarios, offering more control and sometimes better performance than a standard Wi-Fi hotspot.

    This guide will walk you through the various ways to share internet from your Samsung without using a Wi-Fi hotspot, specifically focusing on USB tethering and Bluetooth tethering.

    Understanding Tethering Alternatives

    Before we dive into the “how-to,” let’s briefly understand the two primary methods for sharing internet from your Samsung phone without Wi-Fi hotspot:

    • USB Tethering: This method involves connecting your Samsung phone to another device (usually a computer) using a USB cable. Your phone acts as a modem, providing a wired internet connection.
      • Pros: Generally offers a faster and more stable connection than Wi-Fi or Bluetooth. It can also charge your phone simultaneously.
      • Cons: Requires a physical cable and is limited to one connected device at a time. Not suitable for sharing with devices without a USB port.
    • Bluetooth Tethering: This method uses a Bluetooth connection to share your phone’s internet.
      • Pros: Wireless, convenient for sharing with devices that support Bluetooth and don’t have Wi-Fi (though most modern devices have Wi-Fi). Lower battery consumption than Wi-Fi hotspot.
      • Cons: Slower speeds compared to Wi-Fi or USB tethering. Limited range and typically supports only one device.

    How to Share Internet from Samsung Without Hotspot: Step-by-Step

    Here’s how to utilize USB tethering and Bluetooth tethering on your Samsung Galaxy device.

    Method 1: USB Tethering (Wired Connection)

    USB tethering is ideal when you need a fast, stable connection for a single device, typically a laptop or desktop computer.

    Step-by-Step Guide:

    1. Prepare your Samsung Phone:
      • Ensure your Samsung phone has an active mobile data connection.
      • Make sure your phone’s battery is adequately charged, or connect it to a power source.
    2. Connect Devices:
      • Using a compatible USB cable, connect your Samsung phone to the computer you wish to share internet with. Use the cable that came with your phone for best results.
    3. Enable USB Tethering on Your Samsung Phone:
      • On your Samsung phone, swipe down from the top of the screen to open the Notification Panel.
      • You might see a notification like “USB connected” or “Charging via USB.” Tap on this notification.
      • A menu will appear, often giving options like “Transferring files,” “Charging phone only,” etc.
      • Look for and select the option that says “USB tethering” or “Tethering and portable hotspot”.
      • Toggle the “USB tethering” switch to the On position.
      • Alternatively, you can go through Settings:
        1. Open your phone’s Settings app.
        2. Tap on Connections.
        3. Tap on Mobile Hotspot and Tethering.
        4. Toggle the “USB tethering” switch to the On position.
          • Pro-tip: If you don’t see the “USB tethering” option immediately, ensure your phone is properly connected to the computer via USB and the computer is powered on.
    4. Configure Your Computer:
      • For Windows:
        • Once USB tethering is enabled on your phone, Windows should automatically detect a new network connection (often labeled as an Ethernet connection).
        • You might see a prompt asking if you want to make the network “discoverable.” You can choose “Yes” or “No” based on your preference; it typically doesn’t affect the internet connection itself.
        • Your computer should now have internet access via your Samsung phone.
      • For macOS:
        • After enabling USB tethering on your phone, open System Settings (or System Preferences on older macOS versions).
        • Go to Network.
        • You should see a new connection labeled something like “Android Phone” or “USB Ethernet.” Select it.
        • Ensure its status says “Connected” and that it has an IP address.
        • Your Mac should now be using your phone’s internet.

    Method 2: Bluetooth Tethering (Wireless, Slower Speed)

    Bluetooth tethering is a good option when you need a wireless connection for a single device and speed isn’t the top priority, or if the receiving device lacks Wi-Fi capabilities but has Bluetooth.

    Step-by-Step Guide:

    1. Prepare Both Devices:
      • Ensure both your Samsung phone and the device you want to connect (e.g., another phone, tablet, or laptop) have Bluetooth enabled.
      • Make sure your Samsung phone has an active mobile data connection.
    2. Pair Your Devices via Bluetooth:
      • On your Samsung phone:
        1. Open Settings.
        2. Tap on Connections.
        3. Tap on Bluetooth.
        4. Make sure Bluetooth is toggled On.
        5. Your phone will start searching for nearby Bluetooth devices.
      • On the receiving device (e.g., laptop/tablet):
        1. Go to its Bluetooth settings and make it discoverable.
        2. It should appear in the list of available devices on your Samsung phone.
        3. Tap on the receiving device’s name on your Samsung phone to pair.
        4. Confirm the pairing code (usually displayed on both screens) on both devices.
    1. Enable Bluetooth Tethering on Your Samsung Phone:
      • Once the devices are paired:
        1. On your Samsung phone, go back to Settings.
        2. Tap on Connections.
        3. Tap on Mobile Hotspot and Tethering.
        4. Toggle the “Bluetooth tethering” switch to the On position.
    1. Connect to the Internet on the Receiving Device:
      • For Windows:
        1. Go to Settings > Devices > Bluetooth & other devices.
        2. Locate your paired Samsung phone in the list.
        3. Click on your phone’s name and select “More Bluetooth options” or “Device and printers settings.”
        4. Right-click on your Samsung phone’s icon and select “Connect using” > “Access point” or “Direct connection.”
      • For macOS:
        1. Open System Settings (or System Preferences).
        2. Go to Bluetooth.
        3. Find your paired Samsung phone in the list.
        4. Click on the “i” icon (information) next to your phone’s name.
        5. Look for an option to enable “Network Access” or similar and check it.
        6. Alternatively, go to System Settings > Network, and you might see your Bluetooth connection listed. Select it and ensure it’s connected.
      • For Another Android Device:
        1. Go to Settings > Connected devices > Connection preferences > Bluetooth.
        2. Tap on your paired Samsung phone’s name.
        3. Look for an option like “Internet access” or “Personal Area Network (PAN)” and enable it.
          • Note: The exact wording may vary slightly depending on the device’s Android version and manufacturer.

    Important Considerations

    • Data Usage: All forms of tethering use your mobile data plan. Be mindful of your data limits to avoid extra charges.
    • Battery Drain: While USB tethering can charge your phone, prolonged Bluetooth tethering can still drain your battery, though usually less than a Wi-Fi hotspot.
    • Carrier Restrictions: Some mobile carriers may have restrictions or charge extra for tethering. Always check with your service provider if you’re unsure.
    • Security: USB tethering is inherently more secure than wireless methods as it’s a direct, wired connection. Bluetooth tethering is generally secure if you pair only with trusted devices.

    By understanding and utilizing USB tethering and Bluetooth tethering, you gain more flexibility in how you share your internet connection from your Samsung Galaxy phone, especially when a traditional Wi-Fi hotspot isn’t the best solution. These methods offer reliable alternatives for staying connected on the go.

    FAQ: Sharing Internet from Samsung Without Hotspot

    Q1: What are the main alternatives to Wi-Fi Hotspot for sharing internet from a Samsung phone?

    The main alternatives to Wi-Fi Hotspot for sharing internet from a Samsung phone are USB tethering (a wired connection, typically to a computer) and Bluetooth tethering (a wireless connection, generally slower).

    Q2: Is USB tethering faster than Wi-Fi hotspot?

    Generally, USB tethering tends to offer a more stable and often faster connection than a Wi-Fi hotspot, especially in areas with a lot of wireless interference. It provides a direct, wired link between your Samsung phone and the connected device.

    Q3: Can I charge my phone while using USB tethering?

    Yes, one of the benefits of USB tethering is that your Samsung phone will typically charge from the connected computer’s USB port while you are sharing its internet connection, provided the port supplies power.

    Q4: What are the disadvantages of Bluetooth tethering compared to Wi-Fi hotspot?

    The primary disadvantages of Bluetooth tethering are slower internet speeds and a limited range compared to a Wi-Fi hotspot. It’s also typically limited to sharing with one device at a time, and the receiving device must support Bluetooth internet access.

    Q5: Do I need a special cable for USB tethering?

    You typically just need a standard USB cable that is compatible with your Samsung phone and the device you’re connecting it to (e.g., USB-C to USB-A or USB-C to USB-C). Using the original cable that came with your phone is often recommended for optimal performance.

    Q6: Can I share internet with another phone or tablet using USB tethering?

    USB tethering is primarily designed for connecting to computers (laptops/desktops). While some Android tablets with USB host mode might technically be able to receive internet via USB from a phone, it’s not a common or universally supported feature, and simpler wireless methods are usually preferred for phone-to-phone or phone-to-tablet sharing.

    Q7: Will using USB or Bluetooth tethering cost me extra data charges?

    All forms of tethering (Wi-Fi hotspot, USB, or Bluetooth) use your mobile data allowance. If you exceed your plan’s data limit, your mobile carrier may impose additional charges or throttle your speed. Always check your data plan details with your service provider.

  • How to Use Samsung Secure Folder for Privacy

    How to Use Samsung Secure Folder for Privacy

    In an increasingly digital world, our smartphones hold a vast amount of personal and sensitive information – from private photos and confidential documents to banking apps and personal messages. While standard phone security like PINs and fingerprints offers a baseline, there are times when you need an extra layer of privacy and protection. This is precisely where Samsung Secure Folder comes in.

    Samsung Secure Folder is a powerful, built-in security feature on Samsung Galaxy devices, leveraging Samsung’s robust Knox security platform. It creates an encrypted, isolated space on your phone where you can store apps, photos, videos, documents, and other files completely separate from your main phone environment. This means even if someone gains access to your unlocked phone, they won’t be able to access the contents of your Secure Folder without an additional, separate authentication. It’s like having a digital safe within your smartphone.

    This comprehensive guide will walk you through everything you need to know about how to use Samsung Secure Folder for privacy, from its initial setup to advanced customization and management.

    Understanding Samsung Secure Folder and Knox

    At the heart of Samsung Secure Folder lies Samsung Knox. Knox is a multi-layered security platform integrated into Samsung hardware and software from the chip up. It provides real-time protection against malicious attacks and unauthorized access. Secure Folder utilizes this robust foundation to create a secure, encrypted container.

    Think of it this way: your main phone environment is one apartment, and your Secure Folder is a separate, reinforced vault within that apartment, accessible only with a unique key. Files and apps inside the Secure Folder are isolated and encrypted, providing a significantly higher level of privacy compared to simply hiding items in a regular photo gallery or file manager. Any apps you install inside the Secure Folder run independently and maintain separate data, even if you have the same app installed outside the folder.

    This feature is particularly valuable for:

    • Keeping private photos or videos away from prying eyes.
    • Storing sensitive work documents.
    • Using banking or messaging apps with an added layer of security.
    • Preventing accidental deletion of crucial files.

    Step 1: Set Up Samsung Secure Folder

    Most modern Samsung Galaxy devices running Android 7.0 (Nougat) or newer come with Secure Folder pre-installed. If you don’t see it, you might need to enable it or update your system software.

    1. Access Settings: Open your phone’s Settings app.
    2. Navigate to Security: Scroll down and tap on Security and privacy (or Biometrics and security, depending on your One UI version).
    3. Find Secure Folder: Tap on Secure Folder.
    4. Agree to Terms: You’ll be prompted to agree to the terms and conditions and grant necessary permissions. Tap Continue or Agree.
    5. Sign in with Samsung Account: You will need to sign in with your Samsung Account. This is crucial for being able to reset your Secure Folder lock method if you forget it. If you don’t have one, you’ll be prompted to create one.
    6. Choose Lock Type: Select your preferred lock method for Secure Folder. You can choose from:
      • Pattern
      • PIN
      • Password
      • You can also enable Fingerprints or Face Recognition for quick access after setting up one of the primary lock types.
    7. Complete Setup: Follow the on-screen instructions to set up your chosen lock method. Once done, a Secure Folder icon will appear on your Apps screen.

    Step 2: Move Content into Secure Folder

    Once set up, you can start moving your sensitive data into the secure environment. There are two primary ways to do this: from within the Secure Folder app or directly from your phone’s default apps.

    Method A: Moving Files from within Secure Folder

    1. Open Secure Folder: Tap the Secure Folder icon on your Apps screen and unlock it using your chosen method.
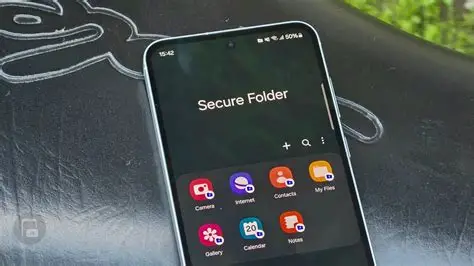
    2. Add Files: Inside Secure Folder, you’ll see a selection of default apps (Gallery, My Files, Camera, Internet, etc.) and a “+” (Add apps) icon. Tap the “Add files” option (often found by tapping the three vertical dots/More options menu in the top right corner, then selecting “Add files”).
    3. Select File Type: Choose the type of file you want to add (e.g., Images, Videos, Audio, Documents, My Files).
    4. Browse and Select: Navigate to the files on your phone’s regular storage. Select the items you wish to move.
    5. Move or Copy: After selecting, you’ll be given options:
      • Move: This moves the original files from your main phone storage into the Secure Folder, deleting them from the original location. This is best for truly private items.
      • Copy: This creates a copy of the files within the Secure Folder, keeping the originals in your main storage. This is useful if you want a protected backup but also need regular access.
    6. Confirm: Tap Done or Move/Copy. The selected items will now be accessible only within your Secure Folder.

    Method B: Moving Files from Default Samsung Apps (e.g., Gallery, My Files)

    This is often the most convenient way to secure existing content.

    1. Open a Samsung App: Open a relevant Samsung app (e.g., Gallery, My Files, Voice Recorder) from your main phone environment.
    2. Select Content: Browse and select the photos, videos, documents, or audio recordings you want to secure.
    3. Move to Secure Folder Option: Tap the three vertical dots (More options) in the corner (usually top right or bottom right, depending on the app).
    4. Look for the option “Move to Secure Folder”. Tap it.
    5. Authenticate: Your phone will prompt you to authenticate your Secure Folder.
    6. Confirm: The selected items will be moved into the corresponding app within your Secure Folder.

    Step 3: Add and Use Apps within Secure Folder

    You can install separate instances of apps inside your Secure Folder, giving you dual accounts or keeping certain app data entirely private.

    1. Open Secure Folder: Tap the Secure Folder icon and unlock it.
    2. Add Apps: Tap the “+” (Add apps) icon.
    3. Choose Source:
      • Add from Apps list: Select an app already installed on your main phone. A duplicate instance will be created in Secure Folder.
      • Download from Play Store / Galaxy Store: This allows you to download and install a completely new app directly into the Secure Folder, which will only exist within that secure environment.
    4. Install/Add: Select the apps and tap Add. The app icon will now appear within your Secure Folder.
    5. Use Apps: Open and use these apps normally. Any data, accounts, or notifications from these apps will remain isolated within Secure Folder. For example, you can have a personal WhatsApp in your main phone and a work WhatsApp in Secure Folder, each with its own account and chats.

    Step 4: Customize Secure Folder for Enhanced Privacy

    Samsung allows you to customize the Secure Folder icon and even hide it completely for an extra layer of stealth.

    Customize Icon and Name

    1. Open Secure Folder: Unlock and open Secure Folder.
    2. Access Settings: Tap the three vertical dots (More options) in the top right corner.
    3. Tap Customize.
    4. Change Icon/Name: You can choose from various pre-set icons and names (e.g., a calculator, a settings icon, a generic folder) or even set a custom image.
    5. Apply: Tap Apply. This makes it harder for casual snoopers to identify the Secure Folder.

    Hide the Secure Folder Icon from the Apps Screen

    This makes Secure Folder virtually invisible to anyone Browse your phone.

    1. Open Secure Folder: Unlock and open Secure Folder.
    2. Access Settings: Tap the three vertical dots (More options) in the top right corner.
    3. Tap Settings.
    4. Toggle off “Add Secure Folder to Apps screen” (or “Show icon on Apps screen”).
    5. Confirm: A pop-up will ask you to confirm. Tap Hide.
    6. To Access When Hidden: When the icon is hidden, you can still access Secure Folder in two ways:
      • Go to Settings > Security and privacy > Secure Folder.
      • Add the Secure Folder toggle to your Quick Panel (swipe down from the top of the screen twice, tap the pencil icon to edit, and drag the Secure Folder toggle to your active Quick Panel). Tapping this toggle will launch Secure Folder.

    Step 5: Configure Auto-Lock and Notifications

    Proper configuration of locking mechanisms and notifications is key to maintaining privacy.

    Set Auto-Lock Secure Folder

    1. Open Secure Folder: Unlock and open Secure Folder.
    2. Access Settings: Tap the three vertical dots (More options) > Settings.
    3. Tap Auto lock Secure Folder.
    4. Choose Lock Option: Select when you want the Secure Folder to automatically lock:
      • Immediately: Locks as soon as you leave the app. (Recommended for maximum privacy).
      • When screen turns off
      • After 5 minutes (or other timed interval)
      • None (Not recommended for privacy)

    Manage Notifications from Secure Folder Apps

    Apps inside Secure Folder often have their own notifications. You can choose how these appear to maintain secrecy.

    1. Open Secure Folder: Unlock and open Secure Folder.
    2. Access Settings: Tap the three vertical dots (More options) > Settings.
    3. Tap Notifications and data.
    4. You can choose to:
      • Hide content: Notifications from apps in Secure Folder will appear, but their content will be hidden from the lock screen or notification panel.
      • Turn off notifications entirely: For ultimate stealth.

    Step 6: Backup and Restore Secure Folder Data (Important!)

    While Secure Folder offers robust protection, it’s vital to have a backup strategy in case your phone is lost, stolen, or damaged, or if you forget your password and cannot reset it (though Samsung Account reset helps).

    1. Open Secure Folder: Unlock and open Secure Folder.
    2. Access Settings: Tap the three vertical dots (More options) > Settings.
    3. Tap Backup and restore.
    4. Backup Data: You can back up your Secure Folder data to Samsung Cloud (if still supported in your region, as Samsung has made changes to cloud backup services) or use Smart Switch to back up to a PC or external storage.
      • Samsung Cloud: Follow on-screen prompts to sign in and select data to back up.
      • Smart Switch: Connect your phone to a PC with Smart Switch installed and follow its instructions to back up data, including Secure Folder content.
    5. Restore Data: If you get a new Samsung device or need to restore your Secure Folder, use the same “Backup and restore” option and select “Restore” to retrieve your data.

    Additional Security Considerations

    • Never Root Your Phone: Attempting to customize the operating system or root your Samsung phone will cause Secure Folder to be automatically locked and inaccessible, potentially leading to data loss. This is part of Knox’s robust security.
    • Samsung Account Recovery: Always ensure your Samsung Account details are up-to-date, as it’s the primary method for recovering access to Secure Folder if you forget your PIN, pattern, or password.
    • Regular Updates: Keep your phone’s software and the Secure Folder app updated to ensure you have the latest security patches and features.

    The Evolution of Mobile Privacy

    The concept of digital privacy on mobile devices has evolved significantly. Early smartphones offered minimal built-in security, relying mostly on third-party apps for file hiding. However, with the increasing amount of personal data stored on phones, manufacturers like Samsung recognized the critical need for deeper, hardware-backed security. Samsung Knox, introduced in 2013, was a pioneering step in enterprise-grade mobile security, eventually extending its capabilities to consumer features like Secure Folder. This integration provides a level of security and isolation that standalone privacy apps often cannot match, as Secure Folder operates within a trusted execution environment on the device itself.

    Frequently Asked Questions (FAQ)

    Q1: Is Samsung Secure Folder truly secure?

    Yes, Samsung Secure Folder is considered very secure. It’s built on Samsung Knox, a robust security platform that provides hardware-backed protection and encryption. Data inside the Secure Folder is isolated from the rest of the device, making it highly resistant to unauthorized access, even if your main phone is compromised. However, no system is entirely impenetrable, and strong passwords/biometrics are still essential.

    Q2: Can I hide the Secure Folder icon?

    Absolutely. You can hide the Secure Folder icon from your Apps screen, making it invisible to anyone casually Browse your phone. You can then access it through your phone’s Settings > Security and privacy > Secure Folder or by adding a dedicated toggle to your Quick Panel for convenient access.

    Q3: What happens to my files in Secure Folder if I factory reset my phone?

    If you perform a factory reset without backing up your Secure Folder data, all content within it will be permanently deleted. It is crucial to use the “Backup and restore” feature within Secure Folder settings (to Samsung Cloud or via Smart Switch to a PC/external storage) before a factory reset.

    Q4: Can I use two different accounts for the same app (e.g., WhatsApp) using Secure Folder?

    Yes, this is one of the most popular uses for Samsung Secure Folder. You can install a duplicate instance of an app (like WhatsApp, Instagram, or a banking app) inside Secure Folder. This instance will operate independently with its own data and accounts, allowing you to effectively run two separate accounts for the same app on one phone.

    Q5: Do notifications from apps in Secure Folder show up on my main phone?

    By default, notifications from apps within Secure Folder will appear on your main phone’s notification panel. However, for enhanced privacy, you can configure these notifications within Secure Folder settings to either hide their content (so only the app icon appears, but not the message preview) or turn them off entirely.

  • How to Shoot Super Slow Motion Videos on Samsung Phones

    How to Shoot Super Slow Motion Videos on Samsung Phones

    In the world of mobile photography and videography, capturing fleeting moments in exquisite detail is a constant pursuit. Super Slow-mo, a feature prominently available on many Samsung Galaxy phones, allows users to record videos at incredibly high frame rates, which when played back at a standard speed, dramatically slows down the action. This creates a mesmerizing effect, revealing nuances that are invisible to the naked eye.

    The technology behind slow motion recording involves capturing a significantly higher number of frames per second (fps) than the standard playback rate (e.g., 24fps or 30fps). While typical slow motion might record at 120fps or 240fps, Super Slow-mo pushes this further, often to 960 frames per second (fps). This high frame rate allows for a truly super slow-down effect, ideal for capturing water splashes, popping balloons, a pet shaking its head, or quick sporting actions. Samsung first introduced this feature on the Galaxy S9, revolutionizing what was possible with smartphone cameras in this niche. It leverages advanced sensor technology and sophisticated image processing to achieve these incredible speeds.

    This guide will walk you through the precise steps to utilize the Super Slow-mo feature on your Samsung Galaxy phone, helping you capture breathtaking slow-motion footage.

    Prerequisites for Shooting Super Slow Motion

    Before you start filming, ensure your Samsung phone is ready:

    • Compatible Device: Super Slow-mo is available on many recent Samsung Galaxy flagship phones, starting with the Galaxy S9/S9+ and continuing through subsequent S-series, Note-series, and some A-series models. Older or entry-level models might only support standard slow motion.
    • Sufficient Lighting: This is crucial. High frame rate video requires a lot of light because the camera’s shutter speed is extremely fast. Bright, even lighting (natural daylight or strong artificial lights) will yield the best results. Low light will result in dark, grainy, and poor-quality slow-motion footage.
    • Steady Hand or Tripod: Even slight camera shakes are exaggerated in slow motion. Use a tripod or keep your hand as steady as possible for smooth footage.
    • Clear Subject: Choose a clear subject with distinct motion you want to highlight.

    Step-by-Step Guide to Shooting Super Slow Motion

    Using the Super Slow-mo feature on your Samsung Galaxy phone is straightforward once you know where to look.

    Step 1: Open the Camera App

    1. Locate Camera Icon: Find and tap the Camera app icon on your home screen or in your app drawer.

    Step 2: Select “Super Slow-mo” Mode

    1. Swipe Through Modes: Once in the Camera app, swipe through the various shooting modes at the bottom of the screen (e.g., Photo, Video, Portrait).
    2. Find Super Slow-mo: Continue swiping until you find Super Slow-mo” and tap to select it.

    Step 3: Choose Your Shooting Method

    Samsung typically offers two primary ways to capture Super Slow-mo video:

    • A. Auto Mode (Motion Detection): This is the easiest method and is often the default. The camera automatically detects motion within a defined frame and records the slow-motion segment.
      1. Identify the Detection Box: On your screen, you will see a square detection box (often yellow or white).
      2. Position Your Subject: Frame your shot so that the action you want to capture in Super Slow-mo will occur within this box.
      3. Start Recording: Tap the Record button (red circle). The camera will record regular speed video.
      4. Automatic Capture: When significant motion is detected within the box, the camera will automatically trigger the Super Slow-mo recording for a very brief burst (typically about 0.2 seconds of real-time action, which expands into several seconds of slow motion).
      5. Stop Recording: Tap the Record button again to stop.
      • Tip: This mode is excellent for unpredictable, fast movements like a balloon popping or a sudden splash.
    • B. Manual Mode: This gives you more control over when the Super Slow-mo burst is captured.
      1. Switch to Manual: If you are in Auto mode, look for an icon (often a rectangle with dots or a gear icon) near the detection box to switch to Manual mode.
      2. Start Recording: Tap the Record button (red circle). The camera will record regular speed video.
      3. Manual Trigger: When the action you want to slow down happens, quickly tap the Super Slow-mo trigger button (it often looks like a play button with slow-motion lines or a small square that appears after you start recording).
      4. Brief Burst: The camera will capture a brief Super Slow-mo segment. You can often tap the trigger button multiple times within a single recording to capture several slow-motion bursts.
      5. Stop Recording: Tap the Record button again to stop.
      • Tip: Manual mode is better for controlled actions where you know exactly when the key moment will occur, such as a golf swing or pouring liquid.

    Step 4: Review and Edit Your Super Slow-mo Video

    After recording, your Super Slow-mo video will be saved in your Gallery.

    1. Open Gallery: Navigate to your Gallery app.
    2. Select Video: Tap on the Super Slow-mo video you just shot.
    3. Edit Options:
      • Playback Speed: Often, you can adjust the speed of the slow-motion segment.
      • Trim: You can trim the overall length of the video.
      • Loop/Reverse/Swing: Some Samsung phones allow you to add effects like looping the slow-motion part, playing it in reverse, or a “swing” effect (forward and backward).
      • Background Music: Add custom background music to your slow-motion clip.
      • Save: Tap Save or Save as new video to apply your edits.

    Tips for Best Super Slow Motion Results

    • Lighting is King: Reiterate the importance of bright, uniform lighting. Without enough light, the fast shutter speed will make your video dark and noisy (grainy). Outdoor daylight is ideal.
    • Practice Timing: Especially in Manual mode, mastering the timing of your tap is essential. Practice a few times before trying to capture the perfect moment.
    • Short Bursts: Remember that Super Slow-mo captures are very brief in real-time. Focus on capturing the peak of the action.
    • Anticipate Movement: For Auto mode, anticipate where the action will happen and position the detection box accordingly.
    • Stable Shooting: Use a tripod or stabilize your phone against a solid surface whenever possible to minimize shake.
    • Clean Lens: A smudge on your camera lens can significantly degrade video quality. Always wipe it clean before shooting.
    • Storage Space: High frame rate videos take up more storage space. Ensure you have enough free space on your phone.
    • Experiment: Try different subjects and scenarios. From water balloons to pets playing, the possibilities are endless.

    Common Issues and Troubleshooting

    • Dark/Grainy Video: Almost always due to insufficient lighting. Move to a brighter area or use strong artificial lights.
    • Missed the Moment: This is a timing issue. Practice more, especially with Manual mode, or try Auto mode for unpredictable events.
    • Choppy Playback: Could be due to insufficient processing power on older phones (less common on modern flagships) or playing on a device that struggles with high-resolution video. Ensure your phone’s software is up to date.
    • Feature Not Found: Your phone model might not support Super Slow-mo at 960fps. Check your specific model’s specifications.

    Conclusion

    The Super Slow-mo feature on Samsung Galaxy phones transforms everyday moments into cinematic experiences. By understanding the core principles of high frame rate videography, ensuring optimal lighting, and mastering the shooting methods, you can unlock incredible creative potential. Whether you’re capturing the delicate flutter of a hummingbird’s wings or the explosive impact of a water balloon, Super Slow-mo allows you to see the world in a completely new light, revealing details you’d otherwise miss.

    FAQ

    Q1: What is the frame rate of Super Slow-mo on Samsung phones?

    Super Slow-mo on most compatible Samsung Galaxy phones records at an incredibly high 960 frames per second (fps). When played back at a standard 30fps, this allows a tiny fraction of a second of real-time action to stretch into several seconds of smooth slow motion.

    Q2: Why are my Super Slow-mo videos so dark or grainy?

    The primary reason for dark or grainy Super Slow-mo videos is insufficient lighting. Recording at 960fps requires an extremely fast shutter speed, which means the camera sensor has very little time to gather light. To get bright, clear videos, you need very strong and even illumination, ideally natural daylight or powerful artificial lights.

    Q3: Can I edit the Super Slow-mo portion of my video after recording?

    Yes! After recording a Super Slow-mo video, you can usually trim the clip, adjust the exact start and end points of the slow-motion segment, change playback speed within that segment, and even add effects like looping, reverse, or background music directly within the Samsung Gallery app’s editor.

    Q4: Is Super Slow-mo available on all Samsung Galaxy phones?

    No, Super Slow-mo at 960fps is typically a feature found on Samsung Galaxy flagship phones starting from the Galaxy S9/S9+ and continuing on subsequent premium models (e.g., S and Note series). Some mid-range or older models might offer a standard slow-motion mode (e.g., 240fps) but not the “super” version. Always check your specific phone model’s camera specifications.

    Q5: What’s the difference between Auto and Manual mode in Super Slow-mo?

    In Auto mode, you position a detection box, and the camera automatically triggers the Super Slow-mo recording when it detects significant motion within that box. This is great for unpredictable, fast events. In Manual mode, you start recording normal speed video, and you manually tap a button on the screen precisely when you want the brief Super Slow-mo burst to occur, giving you more control over the exact timing.

    Q6: Does Super Slow-mo record sound?

    The actual Super Slow-mo segment itself typically does not record usable sound due to the extremely high frame rate. The phone’s camera processes so much visual data that audio capture at that speed is impractical and would sound distorted. However, any regular speed portions of the video before or after the slow-motion burst will have sound. You can also add background music in the editing phase.

    Q7: How much storage space does a Super Slow-mo video take up?

    Because Super Slow-mo records at very high frame rates, even a short clip can take up a considerable amount of storage space compared to a regular video of the same real-time duration. The exact size depends on the resolution and length of the recording, but they are generally larger files.

  • How to Boost Samsung Galaxy Battery Life Using Built-in Tools

    How to Boost Samsung Galaxy Battery Life Using Built-in Tools

    Modern smartphones, including Samsung Galaxy devices, are packed with powerful processors, vibrant displays, and a multitude of features that constantly draw power. Over time, even the best batteries naturally degrade, leading to reduced endurance. However, before resorting to a battery replacement, there are numerous effective strategies you can employ using your Samsung Galaxy’s built-in tools and settings to significantly extend its daily usage.

    Samsung’s One UI (their custom Android skin) integrates sophisticated battery management features designed to help you optimize performance and longevity. These tools empower you to understand your battery usage, identify power-hungry apps, and apply various settings to conserve energy without needing third-party apps or technical expertise.

    This guide will walk you through these essential built-in optimization methods, helping you squeeze every last drop of power from your Samsung Galaxy.

    Method 1: Utilizing Device Care for Overall Optimization

    The Device Care section in your Samsung Galaxy settings is your central hub for maintaining your phone’s health, including battery optimization. It performs a quick diagnostic scan and offers one-tap solutions.

    1. Access Device Care:
      • Go to your phone’s Settings app.
      • Scroll down and tap on “Battery and device care.”
    2. Perform a Quick Optimization:
      • On the “Battery and device care” screen, you’ll see a general overview of your phone’s status.
      • Tap “Optimize now.” This action automatically closes background apps, clears temporary files, and optimizes other settings to improve performance and battery life. It’s like a quick health check for your phone.
    3. Set Up Auto Optimization (Automation):
      • For ongoing maintenance, you can schedule automatic optimization.
      • From the “Battery and device care” screen, tap the three-dot menu (or “More options”) in the top right corner.
      • Tap “Automation.”
      • Select “Auto optimize daily” (or similar wording depending on your One UI version).
      • Choose a time when you’re not typically using your phone (e.g., overnight) for the optimization to run automatically. You can also toggle “Close apps to free up memory” for a more aggressive optimization.

    Method 2: Deep Dive into Battery Settings and App Management

    The “Battery” section within Device Care offers granular control over how apps consume power. This is where you can identify culprits and restrict their background activity.

    1. Access Battery Settings:
      • From “Battery and device care,” tap on “Battery.”
      • Here, you’ll see your battery usage graph and an estimated remaining battery life.
    2. Analyze Battery Usage by App:
      • Scroll down to see “Usage by apps” (or “App usage”).
      • This list shows you which apps have consumed the most battery since the last full charge. Look for apps with unexpectedly high usage, especially if you haven’t been actively using them. These are often the biggest drainers.
    3. Manage Background Usage Limits:
      • Tap on “Background usage limits.” This crucial feature allows you to control what apps do when you’re not actively using them.
      • “Put unused apps to sleep”: Toggle this on. SmartThings will automatically put apps that haven’t been used for a while into a “sleeping” state, restricting their background activity.
      • “Sleeping apps”: Apps in this category run in the background but may not receive updates or send notifications until you open them. You can manually add or remove apps from this list.
      • “Deep sleeping apps”: These apps will never run in the background. They will only work when you open them. This is ideal for apps you use infrequently but don’t want to uninstall. Be cautious with messaging apps or apps that need to send timely notifications, as deep sleeping them will delay alerts.
      • “Never sleeping apps”: This list is for apps you want to ensure always run in the background without any restrictions (e.g., messaging apps, email, navigation). Add apps here sparingly.
    4. Enable Adaptive Battery:
      • From the “Battery” screen, tap “More battery settings.”
      • Toggle on “Adaptive battery.” This feature uses machine learning to analyze your usage patterns over time. It intelligently prioritizes battery power for apps you use most frequently and restricts background activity for less-used apps, optimizing power consumption based on your habits. It learns over time, so give it a few days to show its full effect.

    Method 3: Activating Power Saving Modes

    Samsung Galaxy phones offer various Power Saving modes to quickly extend battery life when you’re running low or want to maximize endurance.

    1. Access Power Saving Mode:
      • From the “Battery” screen (within “Battery and device care”), toggle on “Power saving mode.”
      • Alternatively, you can often find a quick toggle in your Quick Panel (swipe down from the top of the screen). Long-press the “Power saving” icon to jump to its settings.
    2. Customize Power Saving Options:
      • Tapping on the “Power saving mode” text (not just the toggle) will open customization options. These may vary slightly by device model and One UI version but commonly include:
        • Turn off Always On Display: A significant battery saver on AMOLED screens.
        • Limit CPU speed to 70%: Reduces processing power, which saves battery but may slightly impact performance for demanding tasks.
        • Decrease brightness by X%: Automatically lowers screen brightness.
        • Limit apps and Home screen: Restricts available apps and simplifies the home screen (an extreme measure for maximum battery life).
        • Turn off 5G: Disabling 5G and switching to LTE/4G can save considerable battery, especially in areas with weak 5G coverage.
    3. Adaptive Power Saving (If Available):
      • Some models offer “Adaptive power saving” within “More battery settings.” When enabled, your phone will automatically turn on power saving mode based on your usage patterns and remaining battery level.

    Method 4: Optimizing Display Settings

    Your screen is often the biggest battery consumer. Adjusting display settings can yield significant power savings.

    1. Lower Brightness:
      • Manual Adjustment: Swipe down from the top of the screen to open the Quick Panel and manually drag the brightness slider down.
      • Adaptive Brightness: Go to Settings > Display > toggle on “Adaptive brightness.” This automatically adjusts screen brightness based on ambient light, often saving power compared to a consistently high manual setting.
    2. Shorten Screen Timeout:
      • Go to Settings > Display > “Screen timeout.”
      • Set it to a shorter duration (e.g., 15 or 30 seconds). The quicker your screen turns off when inactive, the more battery you save.
    3. Enable Dark Mode (for AMOLED screens):
      • If your Samsung Galaxy has an AMOLED (or Dynamic AMOLED, Super AMOLED) display, Dark Mode can significantly save battery. AMOLED screens produce black by turning off individual pixels, so dark themes use less power.
      • Go to Settings > Display > “Dark mode” (or “Night mode” on older versions). You can schedule it or keep it on all the time.
    4. Adjust Screen Resolution:
      • Higher resolutions consume more power. If your phone supports it, you can lower the resolution.
      • Go to Settings > Display > “Screen resolution.” Try setting it to FHD+ (1080p) instead of WQHD+ (1440p) if your device allows. You might not notice a significant visual difference for everyday tasks, but your battery will.
    5. Disable Always On Display (AOD):
      • While convenient, Always On Display constantly uses power.
      • Go to Settings > Lock screen > “Always On Display.” You can turn it off completely or set it to “Tap to show” or schedule it.

    Method 5: Managing Connectivity and Other Features

    Many background processes and connectivity features can silently drain your battery.

    1. Turn Off Unused Connectivity:
      • Wi-Fi, Bluetooth, GPS/Location: Keep these off when not in use. Swipe down the Quick Panel for easy toggles.
      • Location services: For more fine-grained control, go to Settings > Location. You can see which apps recently used your location and review their permissions.
      • NFC: Turn off NFC (Near Field Communication) when you’re not using mobile payments or device pairing.
    2. Disable Unnecessary Notifications:
      • Excessive notifications keep your screen waking up and your phone actively processing.
      • Go to Settings > Notifications > “App notifications.” Review apps and disable notifications for those you don’t need immediate alerts from.
    3. Limit Live Wallpapers and Widgets:
      • Live wallpapers consume more power than static images.
      • Widgets that constantly update (e.g., weather, news) also draw power. Use them sparingly or choose less data-intensive ones.
    4. Review Sync Settings:
      • Accounts like Google, email, and social media often sync data in the background.
      • Go to Settings > Accounts and backup > “Manage accounts.” Tap on individual accounts and adjust “Sync account” settings for apps you don’t need constant updates from.

    Conclusion

    Extending your Samsung Galaxy’s battery life doesn’t require complex procedures or external apps. By consistently utilizing the powerful built-in tools found within Device Care, tweaking display settings, and mindfully managing your app usage and connectivity, you can significantly boost your phone’s endurance. Remember that battery health is also crucial; avoiding extreme temperatures and shallow charges (keeping it between 20-80%) can help prolong its overall lifespan. Implementing these tips will empower you to enjoy your Galaxy device for longer between charges.

    FAQ Section

    Q1: What is “Adaptive Battery” and how does it help save battery life?

    Adaptive Battery is a Samsung Galaxy feature that uses machine learning to observe your app usage patterns. It learns which apps you use frequently and which you rarely use. Based on this, it intelligently prioritizes battery power for your most used apps and restricts background activity for less-used ones, optimizing power consumption over time without you needing to manually manage every app.

    Q2: Is it better to use “Power saving mode” constantly or only when the battery is low?

    It’s generally best to use Power saving mode when your battery is low, or if you know you’ll be away from a charger for an extended period. While it saves battery, it does so by limiting performance, brightness, and background activities. Using it constantly might slightly degrade your user experience. However, if extended battery life is your top priority, keeping it enabled is an option.

    Q3: Does “Dark Mode” really save battery on Samsung Galaxy phones?

    Yes, Dark Mode significantly saves battery on Samsung Galaxy phones that feature AMOLED displays. AMOLED screens work by illuminating individual pixels. When a pixel displays black, it’s actually turned off, consuming no power. Therefore, displaying more black (dark mode) means more pixels are off, leading to substantial battery savings compared to a white background.

    Q4: How can I identify which apps are draining my battery the most?

    You can easily identify battery-draining apps by going to Settings > “Battery and device care” > “Battery” > “Usage by apps” (or “App usage”). This list shows you the battery consumption of each app since the last full charge, helping you pinpoint the biggest culprits for background restrictions or uninstallation.

    Q5: Should I regularly close all my apps from the recent apps screen to save battery?

    While it might seem intuitive, constantly closing all apps from your recent apps screen is generally not recommended for battery saving and can sometimes even reduce battery life. Android’s system is designed to efficiently manage background apps. Frequently closing and reopening apps forces them to restart from scratch, which uses more processing power and battery than letting them remain in a suspended state in memory, ready to be quickly resumed. Focus instead on using features like “Sleeping apps” or “Deep sleeping apps” within Device Care for true background app management.

  • How to Enable and Use Secure Folder on Your Samsung Galaxy Phone

    In an increasingly digital world, protecting your personal and sensitive information on your smartphone is more important than ever. Your Samsung Galaxy phone comes with a powerful security feature called Secure Folder, designed to give you an extra layer of privacy for your most important data and applications. Think of it as a locked vault within your phone, completely separate from your regular data.

    Samsung Secure Folder leverages the robust security platform Samsung Knox, which is a defense-grade security system built into Samsung devices at the hardware level. Knox provides multi-layered security, protecting your data from malicious threats and unauthorized access. Secure Folder creates a separate, encrypted space that is isolated from the rest of your device’s operating system, ensuring that anything stored inside is protected even if your main phone is compromised.

    Whether you want to hide private photos, keep financial apps secure, or have a separate set of work applications, Secure Folder is an indispensable tool. Let’s walk through how to enable and effectively use this critical privacy feature on your Samsung Galaxy phone.

    What is Secure Folder?

    Secure Folder is a secure, private space on your Samsung Galaxy smartphone where you can store apps, photos, videos, documents, and other files with an additional layer of password, PIN, pattern, or biometric (fingerprint/face) protection. It’s essentially a separate, encrypted environment on your device that no one can access without your specific authentication.

    Historically, the need for enhanced mobile security grew as smartphones became central to our lives, storing everything from personal communications to banking details. Samsung introduced Secure Folder as a built-in solution to address this, providing users with peace of mind that their most private data remains truly private, even if someone else gains access to their phone.

    Why Use Secure Folder?

    The benefits of using Secure Folder are clear, especially for those who value their digital privacy and security:

    • Enhanced Privacy: Keep personal photos, videos, or documents completely hidden from prying eyes.
    • App Duplication: Install a second instance of apps (like messaging apps or social media) within Secure Folder, allowing you to use them with different accounts, separate from your main phone setup.
    • Financial Security: Store banking apps, payment apps, or sensitive work-related applications inside for an added layer of protection.
    • Data Isolation: Even if your main phone’s data is accessed (e.g., if someone unlocks it briefly or malware infects it), the data inside Secure Folder remains encrypted and inaccessible.
    • Confidential Documents: Safely store scanned copies of important documents like passports, birth certificates, or contracts.

    How to Enable Secure Folder on Your Samsung Galaxy Phone

    Enabling Secure Folder is a straightforward process that integrates seamlessly with your phone’s existing security features.

    Step 1: Access Your Phone’s Settings

    • Open the Settings app on your Samsung Galaxy phone. You can do this by swiping down from the top of your screen and tapping the gear icon (âš™) in the Quick Settings panel, or by finding the “Settings” app in your app drawer.

    Step 2: Navigate to Security and Privacy

    • Scroll down the Settings menu and tap on Security and privacy. On older Samsung devices or Android versions, this might be named “Biometrics and security” or simply “Security.”

    Step 3: Find Secure Folder

    • Within the “Security and privacy” menu, look for and tap on Secure Folder.

    Step 4: Set Up Secure Folder

    • You’ll be greeted with a welcome screen for Secure Folder. Tap Continue or Agree to proceed.
    • The phone will then prepare Secure Folder, which might take a minute or two as it creates the encrypted space.
    • Choose your desired lock type: You’ll be prompted to set a lock method for your Secure Folder. You can choose from:
      • Pattern
      • PIN
      • Password
      • Fingerprint (if your device supports it and you’ve set it up for your main phone unlock)
      • Face Recognition (if your device supports it and you’ve set it up)
      • Important: This lock is separate from your main phone lock. Even if your main phone is unlocked, accessing Secure Folder will require this specific authentication.
    • Confirm your chosen lock type: You’ll need to enter your chosen pattern, PIN, or password a second time to confirm it. If using biometrics, you’ll be prompted to scan your fingerprint or face.

    Step 5: Secure Folder is Now Enabled

    Once the setup is complete, the Secure Folder icon (often a folder with a lock) will appear in your app drawer. You might also see a shortcut to it on your Home screen if you choose to add one during the setup.

    How to Use Secure Folder

    Now that Secure Folder is enabled, here’s how to manage your private content and apps within it.

    1. Accessing Secure Folder
    • Tap the Secure Folder icon in your app drawer or on your Home screen.
    • You’ll be prompted to authenticate using the pattern, PIN, password, or biometrics you set up specifically for Secure Folder.
    1. Adding Apps to Secure Folder
    • Once inside Secure Folder, you’ll see a default set of apps like Gallery, Camera, Contacts, Internet, My Files, and Samsung Notes.
    • To add more apps:
      • Tap the Add apps (+) icon within Secure Folder.
      • You can then either add existing apps from your main phone (which creates a duplicate instance within Secure Folder) or download new apps directly from the Google Play Store or Galaxy Store within the Secure Folder environment.
      • Select the apps you want and tap Add.
    1. Moving Files to Secure Folder

    You can move existing photos, videos, audio files, and documents into Secure Folder, making them disappear from your main phone’s gallery or file manager.

    • From your main phone’s Gallery/My Files:
      1. Open the Gallery app or My Files app on your main phone.
      2. Select the photos, videos, or files you want to move.
      3. Tap the More options menu (often three vertical dots or “…” icon).
      4. Select Move to Secure Folder.
      5. You’ll be prompted to authenticate with your Secure Folder lock. Once authenticated, the files will move and only be visible inside Secure Folder.
    • From within Secure Folder (My Files/Gallery):
      1. Open the My Files or Gallery app within Secure Folder.
      2. Tap the More options menu.
      3. Select Add items or Import.
      4. Browse for the files on your main phone and select them.
      5. They will be copied or moved into Secure Folder.
    1. Customizing Secure Folder

    You can personalize the appearance of your Secure Folder icon and name to make it less conspicuous.

    • From within Secure Folder, tap the three vertical dots (More options) in the top right corner.
    • Tap Customize icon.
    • You can change the name, choose a different icon from a selection, or even select an image from your gallery to use as the icon.
    1. Hiding Secure Folder from the App Drawer (Advanced Privacy)

    For ultimate stealth, you can hide the Secure Folder icon from your app drawer and Home screen.

    • Go to Settings > Security and privacy > Secure Folder.
    • Scroll down and toggle Add Secure Folder to Apps screen (or similar wording) Off.
    • To access it later, you’ll need to go back into Settings > Security and privacy > Secure Folder and authenticate from there. You can also add its toggle to your Quick Settings panel for faster access.
    1. Locking Secure Folder
    • Secure Folder automatically locks when your screen turns off.
    • You can manually lock it anytime by:
      • Opening Secure Folder, then tapping the Lock icon (đź”’) at the top of the screen.
      • You can also set it to auto-lock immediately when you leave the app or after a certain time. This setting is usually found within Secure Folder settings (tap the three dots > Settings > Auto lock Secure Folder).

    Important Considerations and Tips

    • Samsung Account: Secure Folder requires a Samsung account to function. This is essential for features like resetting your Secure Folder lock if you forget it.
    • Backup and Restore: You can back up the contents of your Secure Folder to your Samsung Cloud account and restore them to another Samsung device if needed. This is a crucial step if you ever factory reset your phone or get a new one.
    • No Rooting: Secure Folder relies on Samsung Knox’s hardware-level security. Rooting your Samsung device will trip the Knox warranty bit and permanently disable Secure Folder, as well as other Knox-based security features.
    • App Permissions: Apps inside Secure Folder have their own set of permissions, separate from their counterparts outside. You’ll need to grant permissions again for apps within Secure Folder.
    • Notifications: Apps inside Secure Folder generate separate notifications. You can configure these notifications to be hidden or displayed in a generic manner for enhanced privacy.
      • Go to Secure Folder > Settings (three dots) > Notifications and data > Notifications to adjust preferences.
    • Performance: While Secure Folder is designed to be efficient, running multiple heavy apps inside it, especially if also running on the main partition, could have a minor impact on overall device performance or battery life, though this is generally negligible on modern Samsung devices.

    Secure Folder is a testament to Samsung’s commitment to user privacy and security. By taking a few moments to set it up, you can significantly enhance the protection of your most sensitive information, giving you peace of mind in your digital life.

    FAQ (Frequently Asked Questions)

    Q1: Do I need a Samsung account to use Secure Folder?

    Yes, you need a Samsung account to set up and use Secure Folder. This account is essential for features like backing up your Secure Folder content and recovering access if you forget your lock method.

    Q2: What happens if I forget my Secure Folder password/PIN/pattern?

    If you forget your Secure Folder lock, you can reset it using your Samsung account. On the Secure Folder lock screen, look for an option like “Forgot password” or “Reset Secure Folder” and follow the prompts to authenticate with your Samsung account credentials.

    Q3: Can I store any type of file in Secure Folder?

    Yes, you can store various types of files, including photos, videos, audio recordings, documents (PDFs, Word files, etc.), and other file types. You can also add and duplicate almost any app into Secure Folder.

    Q4: Does Secure Folder take up extra storage space on my phone?

    Yes, the content you store within Secure Folder will consume storage space on your device, just like any other files or apps. However, this space is dedicated and encrypted within the Secure Folder’s isolated environment.

    Q5: Will my apps in Secure Folder receive updates?

    Yes, apps within Secure Folder will receive updates just like your regular apps. You can update them through the Google Play Store or Galaxy Store that is accessible from within Secure Folder.

    Q6: If I factory reset my phone, will Secure Folder data be lost?

    Yes, a factory reset will erase all data on your phone, including everything within Secure Folder. It is crucial to back up your Secure Folder content to Samsung Cloud before performing a factory reset or moving to a new device. You can then restore it on the same or a new Samsung phone.

    Q7: Can I use different biometrics (fingerprint/face) for my main phone and Secure Folder?

    No, if you choose to use biometrics (fingerprint or face recognition) for your Secure Folder, it will use the same biometric data that is registered for your main phone’s unlock. However, you will still need to enable it specifically for Secure Folder during the setup process.

    Q8: What is Samsung Knox, and how does it relate to Secure Folder?

    Samsung Knox is Samsung’s defense-grade mobile security platform, built into the hardware and software of Samsung Galaxy devices. It provides multi-layered protection from the moment the device powers on. Secure Folder is a core application that leverages the foundational security provided by Samsung Knox to create its isolated, encrypted environment. This means the security of Secure Folder is deeply integrated and robust.

  • How to Speed up a Slow Samsung Phone

    How to Speed up a Slow Samsung Phone

    Is your Samsung phone feeling sluggish? Are apps taking ages to open, or does multitasking feel like a chore? Over time, even the most powerful smartphones can start to slow down. This is a common issue for many Android users, and Samsung phones, running the Android operating system with its One UI overlay, are no exception. The good news is that most slowdowns aren’t permanent and can be fixed with some straightforward steps.

    A slow phone often points to issues with limited RAM, insufficient storage, or too many processes running in the background. Understanding these common culprits is the first step to a faster device. This comprehensive guide will walk you through various methods, from simple clean-ups to more advanced settings adjustments, to help you reclaim your phone’s speed.

    1. Restart Your Phone Regularly

    It sounds simple, but a quick restart can often work wonders. Think of it as a mini-refresh for your phone. A restart closes all background apps, clears temporary glitches, and refreshes system processes.

    Steps to restart:

    1. Press and hold the Power button.
    2. Tap Restart on the power menu.
    3. Allow your phone to fully shut down and then power back on.

    Make it a habit to restart your phone at least once a week.

    1. Clear Cache Data Regularly

    Cache files help apps load faster but too much or corrupted cache can slow things down.

    To clear individual app cache:

    • Go to Settings > Apps.
    • Choose the app (e.g., Chrome, Facebook).
    • Tap Storage > Clear cache.

    Be careful not to hit Clear data, which removes app settings and logins.

    To clear the system cache partition:

    1. Turn off the device.
    2. Hold Volume Up + Power (and Bixby, if needed).
    3. Release when the Android Recovery screen appears.
    4. Use Volume Down to highlight Wipe cache partition > press Power.
    5. Confirm and reboot.
    1. Free Up Internal Storage

    Phones need breathing room. When storage is low, performance tanks. Aim to keep at least 15–20% of storage free.

    To check and manage storage:

    • Settings > Battery and device care > Storage.

    Clear out:

    • Large videos/photos (move to cloud or SD card).
    • Downloads folder.
    • Unused apps.
    • Old documents.
    1. Uninstall or Disable Unused Apps and Bloatware

    Apps—even unused ones—eat up RAM and storage. Some are pre-installed (bloatware) and can’t be removed, but can often be disabled.

    • Settings > Apps > Choose app > Uninstall or Disable.
    • Sort by size or last used to spot the hogs.
    1. Limit Background App Activity

    Background apps drain performance silently.

    • Settings > Battery and device care > Battery > Background usage limits.
    • Turn on Put unused apps to sleep or Adaptive power saving.
    • Move seldom-used apps to Deep sleep.
    1. Use Device Care to Optimize Performance

    Samsung’s Device Care tool does a quick sweep and fix.

    • Settings > Battery and device care > Tap Optimize now.
    • Visit Memory section to manually clear RAM-hungry apps.

    Run this daily or every few days for smoother operation.

    1. Update Software Regularly

    Updates fix bugs, patch security holes, and optimize performance.

    • Settings > Software update > Download and install.

    Make sure you’re connected to Wi-Fi and charged.

    1. Reduce Animations (via Developer Options)

    Animations can look slick but they slow things down.

    To reduce or disable animations:

    • Enable Developer Options: Settings > About phone > Software info > Tap Build number 7 times.
    • Go back to Settings > Developer options > Adjust:
      • Window animation scale
      • Transition animation scale
      • Animator duration scale
    • Set each to .5x (or Animation off for max speed).
    1. Disable RAM Plus (If You Have It)

    RAM Plus uses internal storage as virtual RAM. On phones with lots of real RAM, this can slow things down.

    • Settings > Battery and device care > Memory > RAM Plus > Toggle Off.
    • Restart your phone.
    1. Factory Reset (Last Resort)

    Still slow after trying everything? A factory reset may help—but it’s a fresh start.

    Backup first! Use Samsung Cloud, Google Drive, or a computer.

    Steps to reset:

    • Settings > General management > Reset > Factory data reset.
    • Follow prompts.

    After the reset, you’ll set it up as new.

    Frequently Asked Questions (FAQ)

    Q1: Why does my Samsung phone get slower over time? Apps update, data accumulates, and older hardware struggles to keep up. Background processes, full storage, and outdated software add to the lag.

    Q2: Will deleting apps help?

    Yes. It frees up space and cuts down on background processes hogging RAM and CPU.

    Q3: How often should I clear cache?

    Monthly for individual apps is fine. Clear system cache after updates or if your phone feels glitchy.

    Q4: Does restarting help?

    Absolutely. It’s a quick reset for memory and background tasks.

    Q5: What’s bloatware?

    Pre-installed apps you didn’t ask for. They often run in the background. Disable them if you can’t uninstall.

    Q6: Should I use cleaner apps?

    Generally, no. Most third-party cleaners do more harm than good. Stick with Samsung’s Device Care.

  • How to Use Samsung Galaxy Phone as Mouse/Trackpad for PC

    How to Use Samsung Galaxy Phone as Mouse/Trackpad for PC

    In today’s interconnected world, the lines between our various devices are constantly blurring. Your Samsung Galaxy phone, a powerful portable computer in its own right, can be surprisingly versatile. One lesser-known but incredibly useful function is transforming it into a mouse or trackpad for your PC. This capability can be a lifesaver if your traditional mouse fails, you’re giving a presentation from a distance, or simply prefer the convenience of a touchscreen interface for navigation.

    Using your phone as a mouse leverages its advanced sensors and wireless connectivity (primarily Wi-Fi or Bluetooth) to send cursor movement and click commands to your computer. While not a direct replacement for a dedicated mouse for intricate tasks, it offers a fantastic solution for basic navigation, media control, and presentations.

    The concept of controlling one device with another wirelessly has evolved significantly. Early attempts often involved clunky software and unreliable connections. However, with the widespread adoption of Wi-Fi and Bluetooth technologies, coupled with powerful mobile operating systems like Android, seamless remote control applications have become common. This innovation reflects a broader trend towards making our personal tech ecosystems more integrated and efficient.

    How to Use Your Samsung Galaxy Phone as a Mouse/Trackpad for PC

    Turning your Samsung Galaxy phone into a PC mouse typically involves installing an app on your phone and a corresponding server program on your computer. Here are the most common and reliable methods:

    Method 1: Using Remote Mouse (Recommended for Ease of Use)

    Remote Mouse is one of the most popular and user-friendly applications for this purpose. It offers a clean interface and robust functionality.

    Step 1: Download and Install Remote Mouse on Your Samsung Galaxy Phone

    • Action: Go to the Google Play Store on your Samsung Galaxy phone.
    • Search: In the search bar, type “Remote Mouse” and search.
    • Install: Find the app developed by “Remote Mouse” (usually the top result) and tap “Install.”

    Step 2: Download and Install the Remote Mouse Server on Your PC

    • Action: On your Windows PC or Mac, open a web browser (like Chrome, Edge, or Safari).
    • Navigate: Go to the official Remote Mouse website: www.remotemouse.net.
    • Download Server: On the website, locate the “Get Server” or “Download Server” section. Choose the correct operating system for your PC (Windows, macOS, or Linux) and download the server application.
    • Install Server: Once downloaded, run the installer file and follow the on-screen instructions to install the Remote Mouse server on your computer. It might require administrative privileges.

    Step 3: Connect Your Phone and PC (Wi-Fi Method)

    Both your Samsung Galaxy phone and your PC must be connected to the same Wi-Fi network for this method to work.

    • On your PC: Ensure the Remote Mouse server application is running. It usually starts automatically after installation and might appear as an icon in your system tray (bottom-right corner on Windows).
    • On your Samsung Galaxy Phone:
      1. Open the Remote Mouse app.
      2. The app will automatically scan for available servers on your Wi-Fi network. Your PC’s name should appear in the list.
      3. Tap on your PC’s name to establish the connection.
      4. Once connected, your phone’s screen will transform into a trackpad.

    Step 4: Using Your Samsung Galaxy as a Mouse/Trackpad

    • Move Cursor: Drag your finger across your phone’s screen just like you would on a laptop trackpad.
    • Left Click: Tap once on the screen.
    • Right Click: Tap with two fingers simultaneously on the screen. (Alternatively, the app might have dedicated left/right click buttons at the bottom).
    • Scroll: Swipe with two fingers up or down.
    • Keyboard: Tap the keyboard icon within the app to bring up a virtual keyboard on your phone for typing on your PC.
    • Additional Functions: Remote Mouse offers additional features like media controls, application launchers, and even presentation modes (often as in-app purchases). Explore the app’s interface for these options.

    Method 2: Using Unified Remote (More Features, Slightly Complex Setup)

    Unified Remote is another powerful option, offering control over a vast array of applications and system functions on your PC, beyond just mouse capabilities.

    Step 1: Download and Install Unified Remote on Your Samsung Galaxy Phone

    • Action: Go to the Google Play Store on your Samsung Galaxy phone.
    • Search: Type “Unified Remote” and search.
    • Install: Find the app by “Unified Intents” and tap “Install.”

    Step 2: Download and Install the Unified Remote Server on Your PC

    • Action: On your Windows PC, Mac, or Linux computer, open a web browser.
    • Navigate: Go to the official Unified Remote website: www.unifiedremote.com.
    • Download Server: Select “Get Server” and download the server application for your operating system.
    • Install Server: Run the installer and follow the instructions. The server will run in the background.

    Step 3: Connect Your Phone and PC (Wi-Fi or Bluetooth)

    Unified Remote supports both Wi-Fi and Bluetooth connections. Wi-Fi is generally easier for initial setup.

    • Wi-Fi Connection:
      1. Ensure both devices are on the same Wi-Fi network.
      2. On your phone: Open the Unified Remote app. It will automatically scan for servers.
      3. Tap on your PC’s name from the “Servers” list to connect.
    • Bluetooth Connection (more advanced setup):
      1. On your PC: Ensure Bluetooth is enabled and discoverable. Go to Bluetooth settings.
      2. On your phone: Go to Bluetooth settings and pair your phone with your PC.
      3. In Unified Remote app: Go to “Servers,” then “Add Server,” and choose “Bluetooth.” Follow the prompts to connect.

    Step 4: Using Your Samsung Galaxy as a Mouse/Trackpad

    • Select “Basic Input” Remote: Once connected in the Unified Remote app, you’ll see a list of “Remotes.” Find and tap on the “Basic Input” remote, which functions as your mouse/trackpad.
    • Move Cursor: Swipe your finger across the screen.
    • Left Click: Tap once.
    • Right Click: Use the dedicated right-click button, or tap and hold (configurable).
    • Scroll: Swipe with two fingers up or down.
    • Keyboard: Access the keyboard via the keyboard icon.
    • Extensive Remotes: Unified Remote’s strength lies in its vast library of pre-built “remotes” for specific applications (e.g., VLC, Spotify, PowerPoint), allowing you to control them directly from your phone.

    Method 3: Using Your Phone’s Built-in Samsung DeX as a Trackpad (For Samsung DeX Compatible Devices)

    If your Samsung Galaxy phone supports Samsung DeX, you have a built-in method to use your phone’s screen as a trackpad when DeX is active. This is primarily for when you connect your phone to an external display (monitor or TV) to use DeX, creating a desktop-like experience.

    • Requirements:
      • A Samsung Galaxy phone compatible with DeX (most flagships and many mid-range phones from recent years).
      • A USB-C to HDMI adapter or a compatible DeX Cable/Station to connect your phone to an external monitor.
    • How to Use:
    1. Connect your phone to a monitor using your DeX adapter/cable.
    2. Once DeX launches on the external display, your phone’s screen will often automatically switch to Trackpad mode.
    3. If it doesn’t, swipe down from the top of your phone screen to open the notification panel. You should see a notification that says Using phone as touchpad” or “DeX is running, tap to use phone as touchpad.” Tap on it.
    4. Action: Your phone screen now functions as a large, responsive trackpad for the DeX interface on the external monitor. You can use gestures similar to a laptop trackpad (tap for click, two fingers for scroll, etc.).

    Important Considerations for All Methods:

    • Network Stability: A stable Wi-Fi connection is crucial for smooth performance.
    • Firewall Settings: Your PC’s firewall might block the server application. You may need to grant permission or create an exception during installation or initial connection.
    • Battery Drain: Using your phone continuously as a mouse can drain its battery faster, especially over Wi-Fi.

    Frequently Asked Questions (FAQ)

    Q1: Can I use my Samsung Galaxy phone as a mouse without an internet connection?

    You do not need an internet connection, but you do need a local network connection. For Wi-Fi, both your phone and PC must be connected to the same Wi-Fi router. For Bluetooth, they simply need to be paired directly.

    Q2: Are these apps free to use?

    Most popular remote mouse apps, like Remote Mouse and Unified Remote, offer a basic free version with essential mouse and keyboard functionality. They typically have premium versions (often one-time purchases) that unlock advanced features like media controls, specific application remotes, and customizable gestures.

    Q3: Can I control my PC from another room using my phone as a mouse?

    Yes, as long as both your phone and PC are connected to the same Wi-Fi network and the signal is strong enough, you can control your PC from anywhere within your network’s range. Bluetooth connections have a more limited range, typically up to 10 meters (33 feet).

    Q4: Will using my phone as a mouse drain its battery quickly?

    Yes, continuously using your phone’s screen and Wi-Fi/Bluetooth radios can drain the battery faster than normal usage. It’s advisable to keep your phone charged or connected to a power source if you plan to use it as a mouse for an extended period.

    Q5: Is it possible to use my phone’s camera as a motion-controlled mouse?

    While theoretically possible with specialized software, it’s not a common or practical feature offered by general remote mouse apps. The primary method relies on your phone’s touchscreen for trackpad-like input, or in some cases, its accelerometer for air gestures (though less common for mouse control).

    Q6: What if my PC doesn’t have Wi-Fi or Bluetooth?

    If your PC lacks built-in Wi-Fi or Bluetooth, you can purchase an inexpensive USB Wi-Fi adapter or a USB Bluetooth dongle to add these capabilities to your computer. Once installed, your PC will be able to connect to your phone via these wireless technologies.

  • How to Check Network Signal Strength on Samsung

    How to Check Network Signal Strength on Samsung

    Understanding your network signal strength on a Samsung phone is key to troubleshooting connectivity issues, finding optimal locations for usage, and even conserving battery life. While the signal bars provide a quick glance, they don’t offer the detailed information needed for precise analysis. This guide will show you how to access the actual signal strength values and what they mean.

    Step 1: Understand Signal Strength Metrics

    Before diving into how to check, it’s crucial to understand the metrics involved. Network signal strength is typically measured in dBm (decibel-milliwatts). This is a standard unit used across all mobile devices, not just Samsung.

    • dBm (decibel-milliwatts): This is a logarithmic measurement of power. The closer the dBm value is to 0, the stronger the signal.
      • Good Signal: -50 dBm to -80 dBm (e.g., -60 dBm is excellent)
      • Usable Signal: -80 dBm to -100 dBm (e.g., -90 dBm is average)
      • Poor Signal: -100 dBm to -120 dBm (e.g., -110 dBm is poor, -120 dBm is virtually no signal)
      • -120 dBm or worse: Often indicates a lost connection or a very weak signal where connectivity is impossible.
    • ASU (Arbitrary Strength Unit): This is an integer value derived from dBm, specifically used by Android. Higher ASU values generally indicate better signal strength. For GSM networks, ASU = (dBm + 113) / 2. For LTE networks, ASU = dBm + 140. While interesting, dBm is the more universal and useful metric for comparison.
    • Cell Tower: This refers to the physical base station that transmits and receives radio signals from your mobile phone, forming part of your mobile network infrastructure. Your phone constantly communicates with the nearest cell tower to maintain a connection.

    Note: A negative sign accompanies all dBm values. So, -60 dBm is a stronger signal than -90 dBm. Think of it like temperature: -5 degrees Celsius is warmer than -20 degrees Celsius.

    Step 2: Check Signal Strength via Samsung Settings (Most Common Method)

    This is the most straightforward way to find your network signal strength on most modern Samsung Galaxy devices running Android.

    1. Open Settings: Swipe down from the top of your screen to open the Quick Panel, then tap the gear icon (Settings). Alternatively, find the “Settings” app icon in your app drawer.
    2. Navigate to Connections: Tap on Connections. This section manages Wi-Fi, Bluetooth, Data Usage, and Mobile Networks.
    3. Go to Mobile Networks: Tap on Mobile networks.
    4. Access Network Operators or Status:
      • On many Samsung models (especially newer ones), you might find the information directly under a section like “Network operators” or “SIM card manager” > “Network mode” then look for “Signal strength” or “Network type and strength.”
      • More commonly, you’ll need to tap About phone (or About device) at the very bottom of the main Settings screen.
    5. Find Status Information: Inside “About phone,” tap on Status information (or just Status).
    6. Locate SIM Card Status: Within “Status information,” tap on SIM card status.
    7. View Signal Strength: Here, you will see fields like Signal strength (measured in dBm and ASU), Network type (e.g., LTE, 5G, HSPA), and Mobile voice network type. This gives you a precise reading of your current connection quality.

    Troubleshooting Tip: If you move to a different location, the dBm value will likely change. To get an updated reading, navigate back to this screen after a few seconds.

    Step 3: Use the Secret Dialer Code (Engineering Mode)

    For a more in-depth look, particularly on older or specific Samsung models, you can sometimes access an engineering or service mode via a dialer code.

    1. Open Phone App: Go to your phone’s dialer application.
    2. Enter Code: Dial ****#0011#***.
    3. Access Service Mode: This code should immediately launch the ServiceMode screen. This screen displays various network parameters, including Rx dBm (Receive dBm) and other signal quality metrics. The information presented here can be quite technical.
    4. Interpret Data: Look for “Rx dBm” or similar indicators of signal strength. This screen might also show information about the connected cell tower (e.g., Cell ID).

    Caution: The ServiceMode screen contains advanced information. Do not change any settings unless you know exactly what you are doing, as this could impact your phone’s network performance. This code may not work on all Samsung models or carrier-locked devices.

    Step 4: Utilize Third-Party Apps for Detailed Analysis

    While built-in methods are good, third-party apps often offer more user-friendly interfaces, historical data, and mapping features. They can be particularly useful for identifying dead zones or comparing network performance over time.

    1. Go to Google Play Store: Open the Google Play Store app on your Samsung phone.
    2. Search for Signal Strength Apps: Search for terms like “network signal strength,” “cell signal monitor,” or “LTE discovery.”
    3. Popular Apps (Examples):
      • Network Cell Info Lite: This popular app provides real-time signal strength (dBm), network type (2G, 3G, 4G, 5G), cell ID, and even a map view showing nearby cell towers.
      • LTE Discovery: Focused primarily on 4G LTE and 5G networks, this app provides detailed information about your connected band, cell ID, and signal metrics like RSRP, RSRQ, and SINR, which are crucial for advanced LTE/5G analysis.
      • OpenSignal: This app offers signal maps, speed tests, and allows you to find the best network coverage in your area based on crowd-sourced data.
    4. Install and Use: Download and install the app of your choice. Grant necessary permissions (e.g., location access for mapping).
    5. Interpret Data: Each app will display signal strength (dBm) along with other relevant network parameters. These apps often provide graphs or visual indicators, making it easier to track changes as you move.

    Pro Tip: Use these apps to walk around your home or office. Observe how the dBm values change to find the spots with the best and worst network coverage. This is a practical application of understanding your signal strength.

    Step 5: Troubleshoot Based on Signal Strength

    Once you know your signal strength, you can take steps to improve it.

    • Move to a Better Location: If your dBm is consistently poor (-100 dBm or worse), simply moving closer to a window, going upstairs, or stepping outside can often make a significant difference.
    • Identify Obstructions: Thick walls, basements, and certain building materials can block cellular signals.
    • Restart Your Phone: Sometimes, a simple restart can force your phone to reconnect to the nearest or strongest cell tower.
    • Reset Network Settings: If you’re experiencing persistent issues, try resetting your network settings (Settings > General management > Reset > Reset network settings). This will clear Wi-Fi passwords and paired Bluetooth devices but can resolve stubborn connectivity glitches.
    • Check for Carrier Outages: Sometimes, the problem isn’t your phone but your mobile network operator (MNO). Check their website or social media for reported outages in your area.
    • Consider a Signal Booster: In areas with consistently weak signals, a cellular signal booster can amplify the existing signal from a nearby cell tower, significantly improving your reception indoors. This is often a solution for homes or businesses in rural areas or buildings with poor signal penetration.

    By following these steps, you can accurately assess your network signal strength on your Samsung device and take informed actions to enhance your connectivity experience.

    FAQ: How to Check Network Signal Strength on Samsung

    Q1: What is a good dBm for network signal strength?

    A good dBm reading is typically anything from -50 dBm to -80 dBm. For example, -60 dBm indicates excellent signal strength, while -90 dBm is generally considered average but usable. The closer the dBm value is to 0, the stronger the signal.

    Q2: Why do my signal bars show full but my dBm is weak?

    Signal bars are a visual estimate and are not always accurate. They can be misleading as different phone models and carriers might interpret the same dBm value differently for display. The dBm value is the actual, precise measurement of your network signal strength, making it a more reliable indicator than the bars.

    Q3: Can my phone’s case affect signal strength?

    Yes, some phone cases, especially thick metallic or poorly designed ones, can potentially interfere with your phone’s antennas and degrade network signal strength. If you suspect your case is an issue, try removing it and checking the dBm value again.

    Q4: What’s the difference between RSRP, RSRQ, and SINR in LTE/5G signal strength?

    • RSRP (Reference Signal Received Power): The primary measurement of signal strength for LTE and 5G. Similar to dBm for 2G/3G, a higher (less negative) RSRP is better.
    • RSRQ (Reference Signal Received Quality): Measures the quality of the signal, taking into account interference from other cell towers. A higher RSRQ (less negative) indicates better signal quality.
    • SINR (Signal to Interference + Noise Ratio): Indicates the ratio of the desired signal to the background noise and interference. A higher SINR value means a cleaner signal and better data speeds. These are more advanced metrics often found in third-party apps.

    Q5: How can I improve my Samsung phone’s signal if it’s consistently weak?

    Try moving to a location with fewer obstructions (like outdoors or near a window). Restarting your phone can help. If the problem persists, consider resetting your network settings (which will erase saved Wi-Fi networks). In very weak signal areas, a cellular signal booster or contacting your mobile network operator might be necessary.