In the world of mobile videography, achieving a cinematic look often requires more than just pointing and shooting. It demands control over various aspects of the image, from exposure to color. While Samsung Galaxy phones are renowned for their impressive camera hardware, their default camera app, while excellent for everyday use, sometimes lacks the granular control needed for truly professional-looking footage. This is where Samsung Expert RAW comes into play.
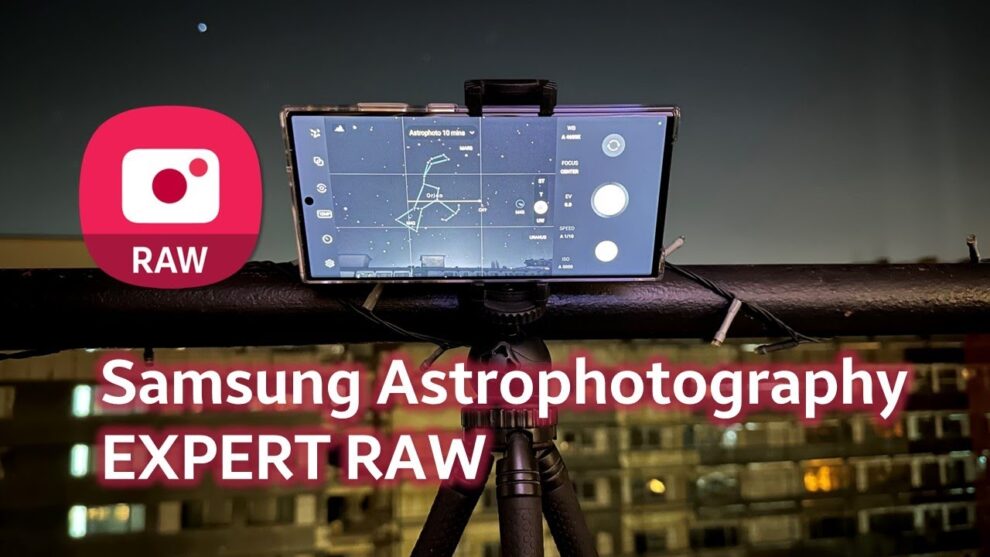
Samsung Expert RAW is a powerful camera app developed by Samsung that unlocks advanced photographic capabilities on select Galaxy devices. While its primary focus has traditionally been on RAW photo capture, recent updates and clever usage techniques allow creators to leverage its manual controls to significantly enhance the cinematic quality of their videos. It provides a level of control typically found in dedicated mirrorless cameras or DSLRs, empowering users to move beyond simple point-and-shoot footage to craft visually rich and engaging narratives.
The concept of cinematic video revolves around several key elements: shallow depth of field, specific aspect ratios, controlled motion blur, deliberate color grading, and smooth camera movements. Historically, achieving this look was exclusive to professional film cameras. However, with advancements in smartphone camera technology and apps like Expert RAW, these once-exclusive capabilities are now accessible to a wider audience, transforming a pocket-sized device into a powerful storytelling tool.
Understanding Expert RAW’s Role in Cinematic Video
It’s important to clarify: Samsung Expert RAW is primarily a photo application. It does not record video in RAW format directly (a feature typically found only on very high-end professional cinema cameras). However, the manual controls it offers for photography can be meticulously applied to video settings in a separate, dedicated video recording app or by understanding how exposure and white balance settings translate. The trick is to use Expert RAW’s precise control as a reference and then apply those settings (or similar ones) within your main camera app’s Pro Video mode, or by utilizing third-party apps that offer similar manual video controls.
The real power of Expert RAW for video lies in:
- Manual Exposure Control: Setting ISO, shutter speed, and aperture (on compatible lenses/phones).
- Manual White Balance: Achieving accurate and consistent color temperatures.
- Linear DNG RAW Capture (for Photos): While not direct video, capturing DNG RAW photos means you get a flat, uncompressed image file with maximum dynamic range, which is similar to the philosophy of recording “flat” profiles for video that are then heavily graded in post-production. This teaches you the principles of a “flat” image.
How to Set Up Your Samsung Galaxy for Cinematic Video (Using Expert RAW Principles)
This process involves utilizing Expert RAW to understand and set optimal manual exposure values, and then applying those principles either in your phone’s native Pro Video mode or a third-party professional video app.
Step 1: Install and Understand Samsung Expert RAW
- Download Expert RAW:
- Open the Galaxy Store on your compatible Samsung Galaxy phone (typically S21 Ultra, S22 series, S23 series, S24 series, Z Fold series, etc.).
- Search for “Expert RAW” and install the application.
- Familiarize Yourself with Controls:
- Open the Expert RAW app.
- You’ll see manual controls for ISO, Shutter Speed, White Balance (WB), Focus (AF/MF), and potentially Exposure Value (EV).
- Entity Definition: ISO (International Organization for Standardization) in photography and videography refers to the sensor’s sensitivity to light. A lower ISO means less sensitivity and less noise, ideal for bright conditions. A higher ISO means more sensitivity but introduces more digital noise, useful in low light.
- Entity Definition: Shutter Speed determines how long the camera’s sensor is exposed to light. For video, it also controls motion blur. A slower shutter speed creates more motion blur, which is often desirable for a cinematic look.
- Entity Definition: White Balance (WB) is the process of removing unrealistic color casts, so that objects which appear white in person are rendered white in your video. It’s measured in Kelvin (K).
Step 2: Set Your Frame Rate and Aspect Ratio
These settings are crucial for the cinematic look and are typically found in your phone’s native camera app’s Pro Video mode or a dedicated third-party video app (e.g., FiLMiC Pro, Protake).
- Frame Rate:
- For a traditional cinematic look, aim for 24 frames per second (fps). This is the standard frame rate for feature films.
- If you plan on slow-motion, record at 48fps or 60fps (for 2x or 2.5x slow motion respectively) if your final output is 24fps.
- Entity Definition: Frame Rate (FPS – Frames Per Second) refers to the number of individual images or frames displayed per second in a video. A lower frame rate (like 24fps) creates a more traditional filmic motion blur, while higher frame rates (like 60fps or 120fps) result in smoother motion and allow for slow-motion effects.
- Aspect Ratio:
- The classic cinematic aspect ratio is 2.35:1 or 2.39:1 (anamorphic), which creates the wide, letterboxed look.
- Your phone’s camera app might offer a “16:9” option (standard widescreen TV), or a “Full” (20:9 or similar) option. If you want a truly wide cinematic look, you might need to crop in post-production or use an app that allows custom aspect ratios.
Step 3: Master the “180-Degree Shutter Rule” for Motion Blur
This rule is fundamental to achieving cinematic motion blur.
- The Rule: Your shutter speed should be approximately double your frame rate.
- For 24fps, set shutter speed to 1/48 (or closest, usually 1/50).
- For 30fps, set shutter speed to 1/60.
- For 60fps, set shutter speed to 1/120.
- How to Achieve This with Expert RAW’s Help:
- Open Expert RAW.
- Go to the Shutter Speed control. Adjust it to the desired value (e.g., 1/50).
- Crucially: If it’s too bright and you can’t get to 1/50 without overexposing, this indicates you need an ND filter.
- Entity Definition: An ND Filter (Neutral Density Filter) is a grey-tinted filter that reduces the amount of light entering the camera lens without affecting the color. It’s essential in bright conditions to allow you to use a slower shutter speed (to achieve cinematic motion blur) and/or a wider aperture (for shallow depth of field) without overexposing the image.
- Applying to Video:
- Once you’ve determined the correct shutter speed in Expert RAW for your lighting conditions (and whether you need an ND filter), switch to your phone’s Pro Video mode (in the native camera app) or your preferred third-party video app.
- Manually set the shutter speed to the value you determined.
- Personal Insight: I often use Expert RAW as a “light meter” before switching to video. I’ll dial in my ideal shutter speed (e.g., 1/50s) and then adjust ISO until the exposure looks good. If ISO is at its minimum and it’s still overexposed, I know it’s time to put on an ND filter. This proactive approach saves a lot of wasted takes.
Step 4: Control Exposure (ISO and Aperture/Lens Selection)
After setting your shutter speed, adjust ISO to get the correct exposure.
- ISO Adjustment:
- In your Pro Video mode or third-party app, manually adjust the ISO up or down until your scene is properly exposed.
- Always try to keep the ISO as low as possible to minimize digital noise, especially in darker areas of your video.
- Aperture/Lens Choice:
- Samsung Galaxy phones have fixed apertures for their main lenses. However, you can select different lenses (e.g., ultra-wide, wide, telephoto) which often have different apertures and focal lengths.
- For a shallower depth of field (blurry background, common in cinematic shots), use the main wide-angle lens (which typically has the widest aperture, e.g., f/1.7 or f/1.8) and get physically closer to your subject. The telephoto lens can also compress perspective and create a shallower depth of field effect.
Step 5: Master White Balance for Consistent Color
Manual White Balance is crucial for maintaining consistent color and achieving a specific mood.
- Set Manually:
- Instead of “Auto WB,” manually set the Kelvin (K) value in your Pro Video mode or third-party app.
- Common WB values:
- Daylight (sunny): 5200K – 5600K
- Cloudy: 6000K – 7000K
- Shade: 7000K – 8000K
- Tungsten/Incandescent: 2700K – 3200K
- Fluorescent: Varies (e.g., 4000K – 5000K)
- Use Expert RAW’s White Balance preview to gauge the correct Kelvin value, then apply it to your video app.
- Use a Grey Card (Optional but Recommended): For perfect White Balance, use a grey card. Point your camera at the grey card, adjust WB until the card appears neutral grey on your screen, and then lock that setting.
Step 6: Focus Manually (if possible)
While autofocus is convenient, manual focus allows for precise control and avoids “focus hunting.”
- Switch to Manual Focus (MF): In your Pro Video mode or third-party app, switch from Autofocus (AF) to Manual Focus (MF).
- Set Focus: Carefully adjust the focus slider until your subject is perfectly sharp.
- Focus Pulls (Advanced): For cinematic effects, you can perform “focus pulls” where you smoothly shift focus from one subject to another during a shot. This requires practice.
Step 7: Enhance Stability and Movement
Unstable footage immediately breaks the cinematic illusion.
- Use a Gimbal: A gimbal (a motorized stabilizer) is the single most important accessory for smooth, cinematic camera movements. It eliminates shakes and jitters.
- Entity Definition: A gimbal in videography is a motorized stabilizer that uses gyroscopes and motors to keep a camera steady, allowing for incredibly smooth and fluid camera movements even when the operator is walking or running.
- Tripod: For static shots, time-lapses, or precise pans/tilts, a tripod is essential.
- Practice Smooth Movements: Even handheld, practice slow, deliberate movements like gentle pans, tilts, or tracking shots. Avoid sudden jerks.
Step 8: Post-Production (Color Grading and Editing)
This is where the true cinematic look comes to life.
- Color Grading:
- Use video editing software (e.g., Adobe Premiere Pro, DaVinci Resolve, CapCut, InShot) on your phone or computer.
- Adjust colors, contrast, saturation, and highlights/shadows to achieve your desired aesthetic. Many cinematic looks involve desaturated colors, specific color shifts (e.g., teal and orange), and controlled contrast.
- Entity Definition: Color grading is the process of altering and enhancing the color of a video image, often to create a specific mood, style, or visual continuity. It’s a critical part of achieving a “cinematic” look.
- Editing:
- Choose your best shots.
- Cut on action, use deliberate pacing, and incorporate sound design (music, sound effects) to enhance the emotional impact.
By meticulously controlling these elements, using Samsung Expert RAW as a guide for understanding exposure and white balance, and then applying those principles in a dedicated video recording mode or app, you can transform your Samsung Galaxy phone into a powerful tool for creating stunning, cinematic videos. It’s a journey of learning and experimentation, but the results are incredibly rewarding.
Frequently Asked Questions (FAQ)
Q1: Can Samsung Expert RAW record RAW video?
A1: No, Samsung Expert RAW is primarily a photo application and does not record RAW video. It records still images in DNG RAW format. When aiming for cinematic video, you use Expert RAW’s manual controls as a reference to set similar parameters (like shutter speed, ISO, and white balance) in your phone’s native Pro Video mode or a third-party video recording app.
Q2: Why is the “180-degree shutter rule” important for cinematic video?
A2: The “180-degree shutter rule” (shutter speed = 1 / (2 x frame rate)) is crucial for achieving natural-looking motion blur in video, which is a hallmark of the cinematic look. Without it, motion can appear choppy or “strobey,” resembling home video rather than film. For example, at 24 frames per second (fps), your shutter speed should ideally be 1/48th of a second (often rounded to 1/50th).
Q3: What is an ND filter and why might I need one for cinematic video?
A3: An ND filter (Neutral Density filter) is a dark piece of glass that attaches to your phone’s camera lens. It reduces the amount of light entering the sensor without affecting color. You need an ND filter when it’s too bright to use a slow enough shutter speed (like 1/50s for 24fps video) without overexposing your footage. It allows you to maintain the 180-degree shutter rule even in bright daylight.
Q4: How do I achieve shallow depth of field (blurry background) with my Samsung Galaxy?
A4: While phone cameras have small sensors limiting natural shallow depth of field, you can maximize it by:
- Using your phone’s main wide-angle lens (it typically has the widest aperture).
- Getting physically closer to your subject.
- Ensuring your subject is relatively far away from the background.
- The telephoto lens can also create a perception of compressed depth, aiding in background separation.
Q5: What’s the best frame rate for a cinematic look?
A5: The standard frame rate for a traditional cinematic look is 24 frames per second (fps). This is because most feature films are shot and projected at this rate, giving footage a familiar, smooth motion aesthetic. If you plan to incorporate slow-motion, record at a higher frame rate like 48fps or 60fps, which you can then slow down in post-production to fit a 24fps timeline.
Q6: What’s the role of color grading in creating cinematic videos?
A6: Color grading is the process of adjusting the colors, contrast, and overall tone of your video footage in post-production. It’s essential for achieving the final “look” and mood of your video, much like film photographers used different films or darkroom techniques. It allows you to enhance visual storytelling, evoke specific emotions, and unify the aesthetic across your entire video.


